FREE DELIVERY ABOVE $60

Posted on Leave a reply

Yeast – Baker’s & Natural

Yeast – Baker’s & Natural

By: RedmanShop | February 17, 2025

Baker’s and Natural Yeast

Baker’s and Natural are two types of yeast more commonly used in baking, each providing the basis for dough fermentation. Yeast requires special conditions for it to perform consistently throughout the fermentation process. Yeast growth is shown by its increasing capacity to multiply and bud. The conditions necessary for its growth are water, food, oxygen, time, temperature, and appropriate acidity/alkalinity level (pH).

Baker’s Yeast

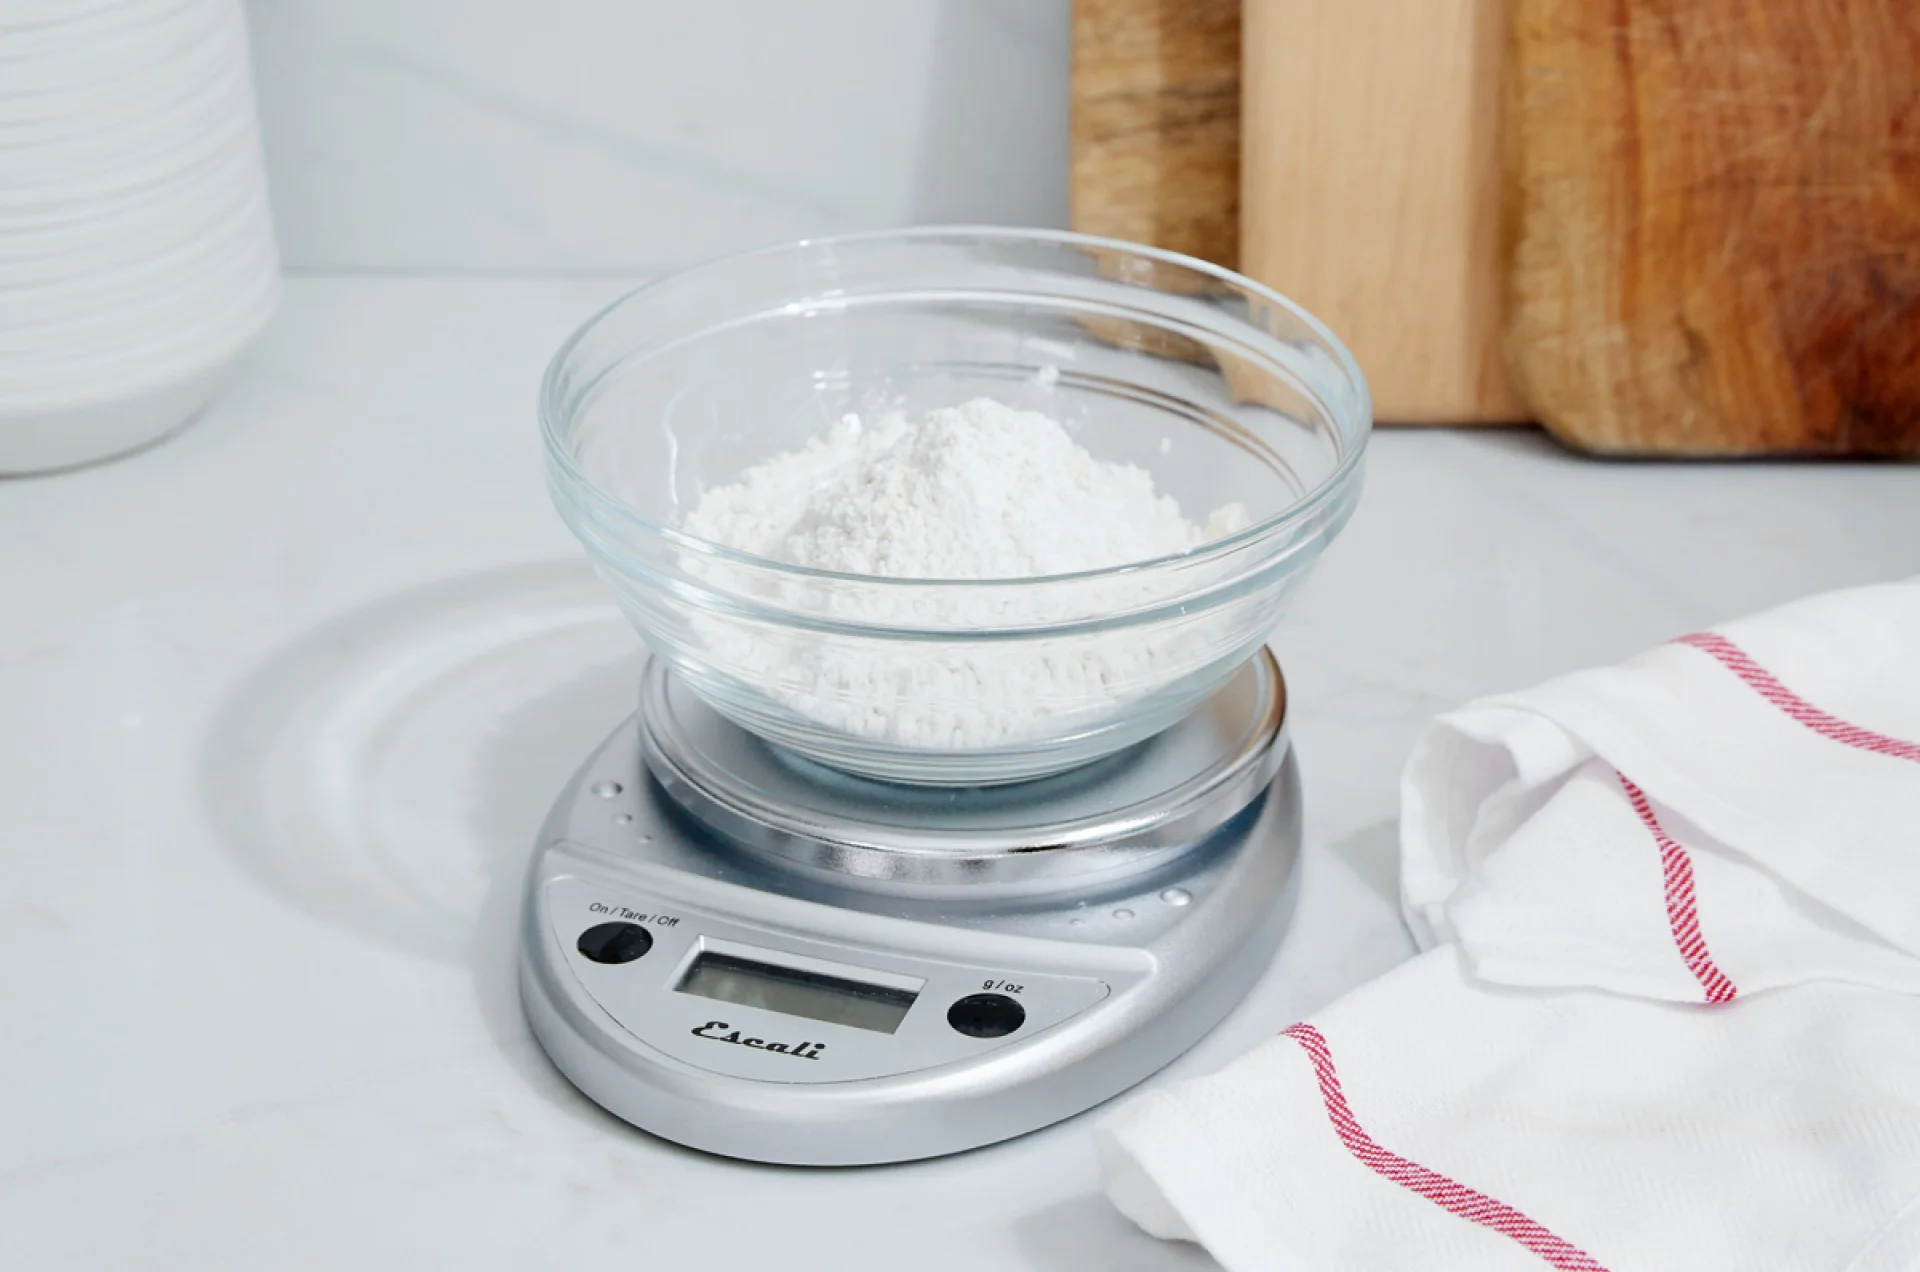
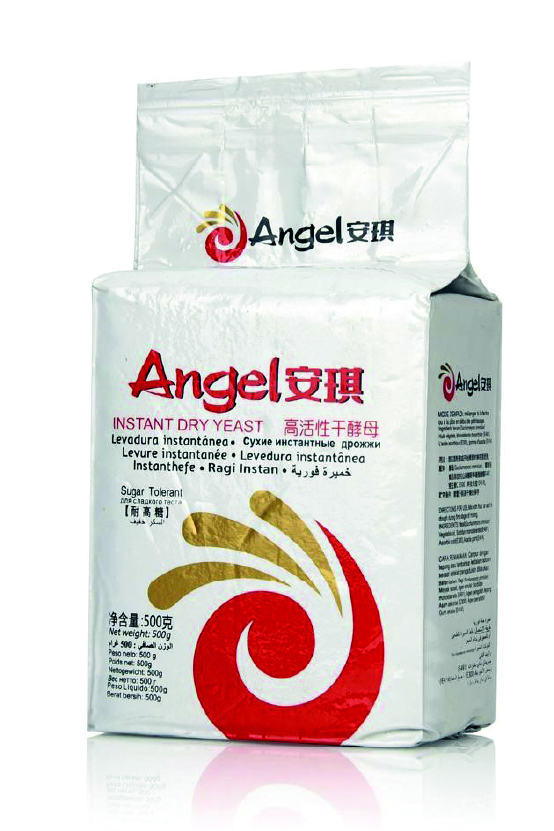
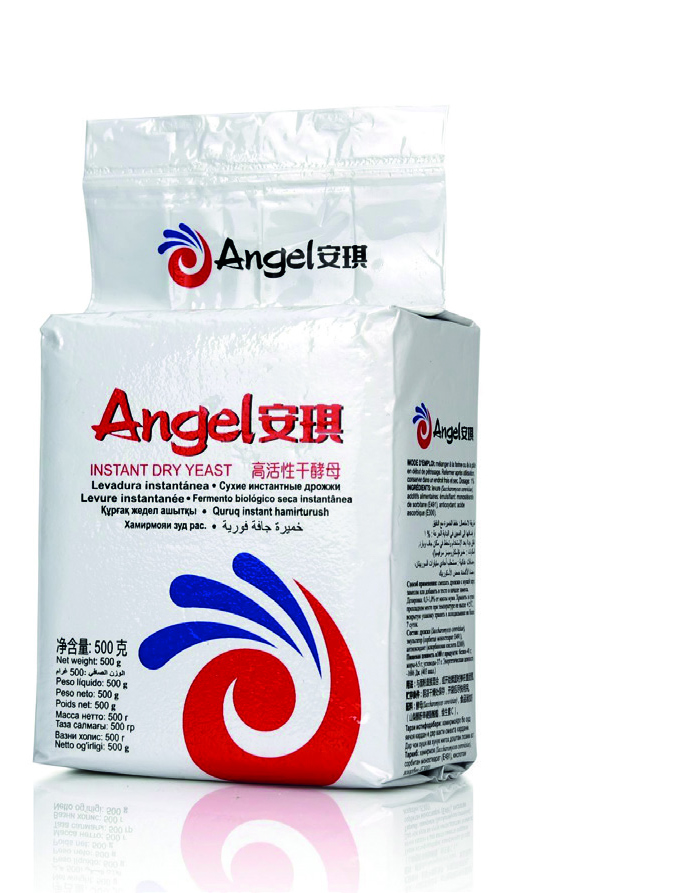
Baker’s Yeast is a commercial product available in several forms, such as low-sugar or high sugar-tolerant varieties. The choice of which yeast will depend on the dough’s sugar levels. Low sugar yeast works well up to 10% sugar content, whereas high sugar yeast works best in doughs with above 10% sugar content. To check the Percentage of sugar in the recipe, use the Bakers Percentage calculation method, as explained in Part Two.
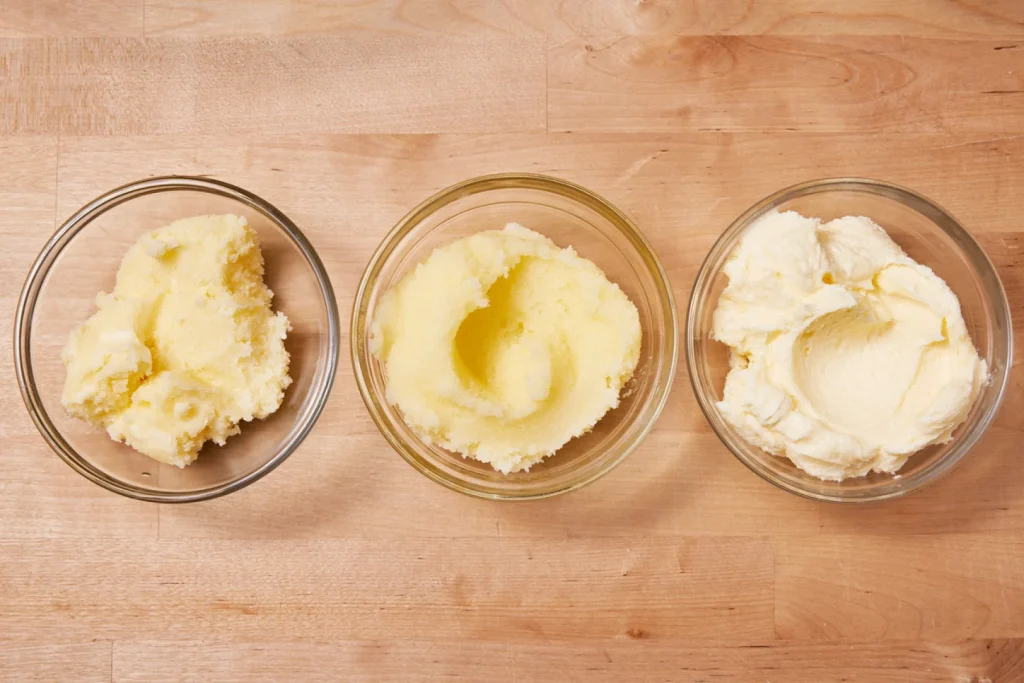
Types of Yeast

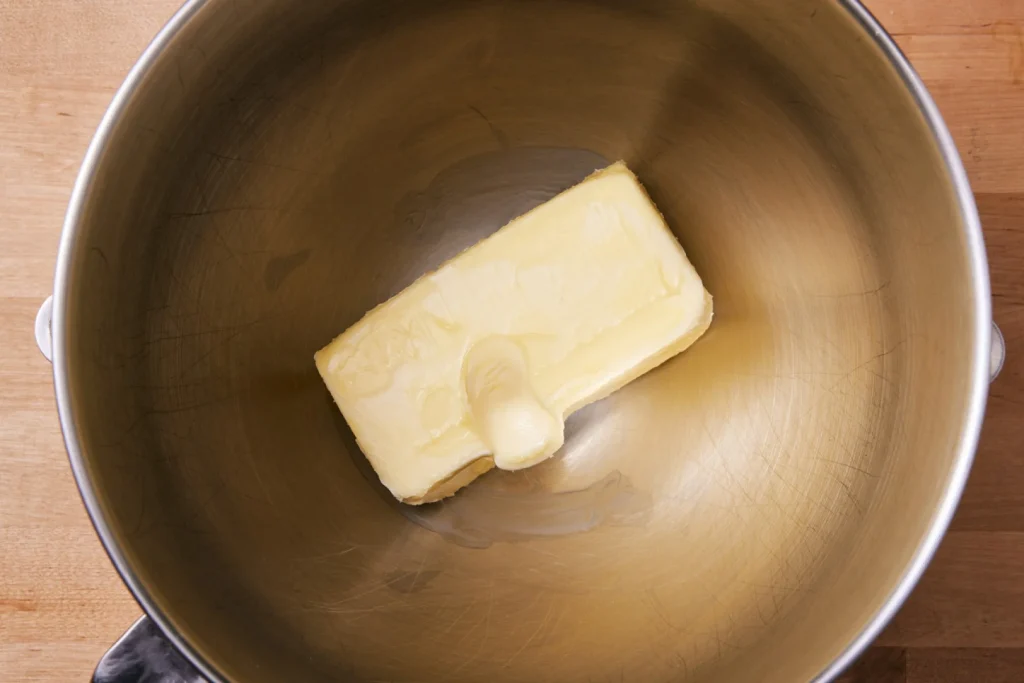
Compressed : Block form is the most common. It is also available in flakes for larger plant bakeries.

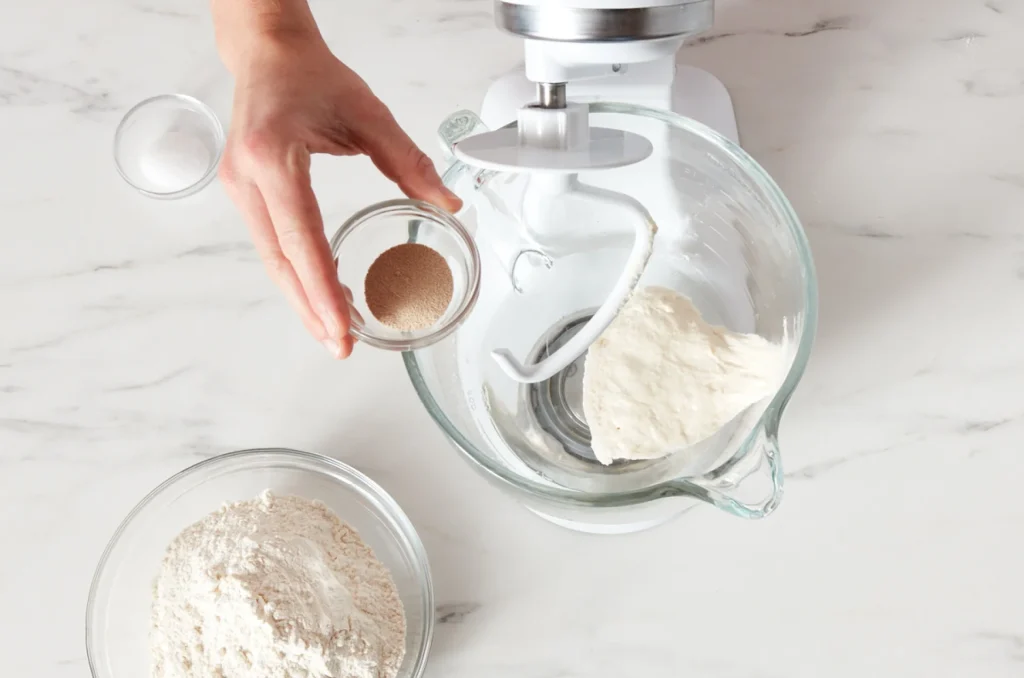
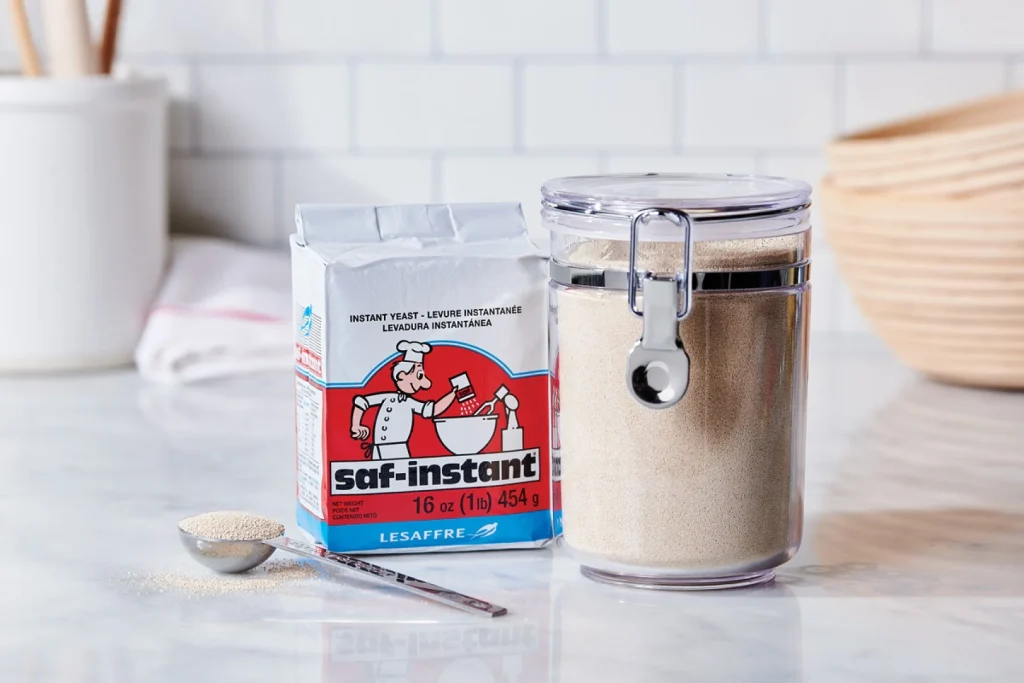
Dried Yeasts: Instant Dried / Instant Active DriedStrains of yeast that have had the water removed. The yeast is re-activated by mixing with warm water. It is added directly into the dough when it is mixed.

Note: To convert fresh yeast usage to dried yeast, multiply the quantity by 0.4.

High and Low Sugar Yeasts

The type of yeast used in the dough relates to the amount of sugar in the formula. For lean dough formulas, sugar will range from 0% – 10% on the flour weight. In rich sweet dough formulas, sugar can be 12% to 20% of the flour weight. The high sugar yeast strain is required in these doughs as regular yeast will not be able to create enough fermentation activity. The dough would move slowly as low-sugar yeast cannot cope with high-sugar levels.

Storage

For dried yeasts, refrigeration in airtight containers is most suitable. Fresh compressed yeast also needs refrigeration and is wrapped in appropriate paper to prevent it from drying out. Buy small packs until confident so as not to waste ingredients. Do not purchase large pack sizes (500g) at first, as they deteriorate with age.

Must Know

Yeast is a living organism and requires attention to detail to obtain a consistent result. Buying yeast in individual small sachets is recommended rather than a large amount. Once opened, its gassing properties deteriorate.

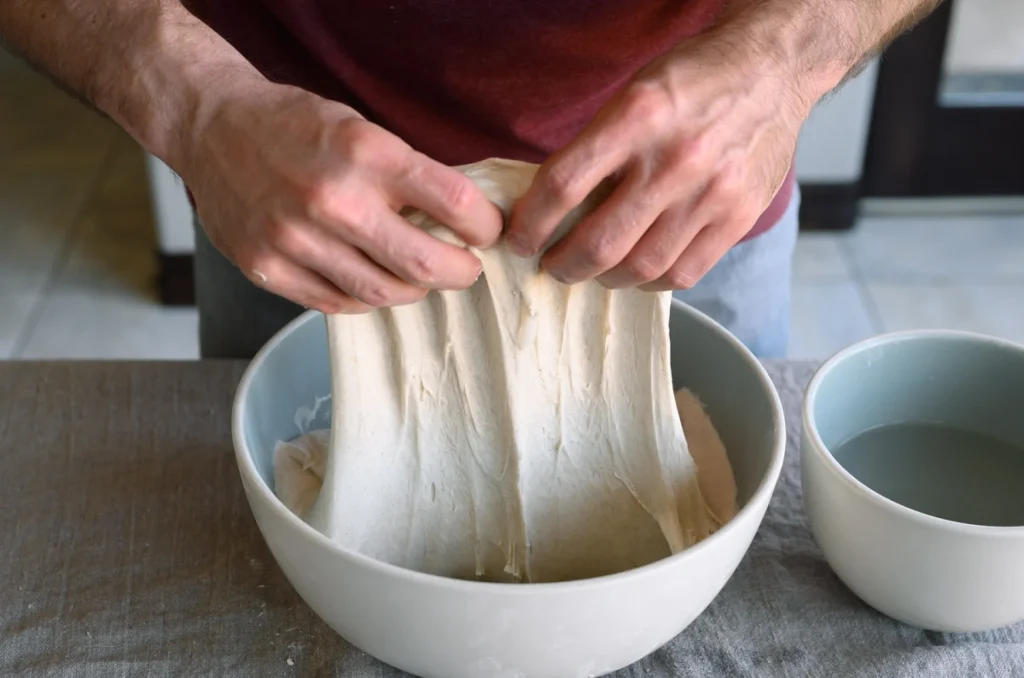
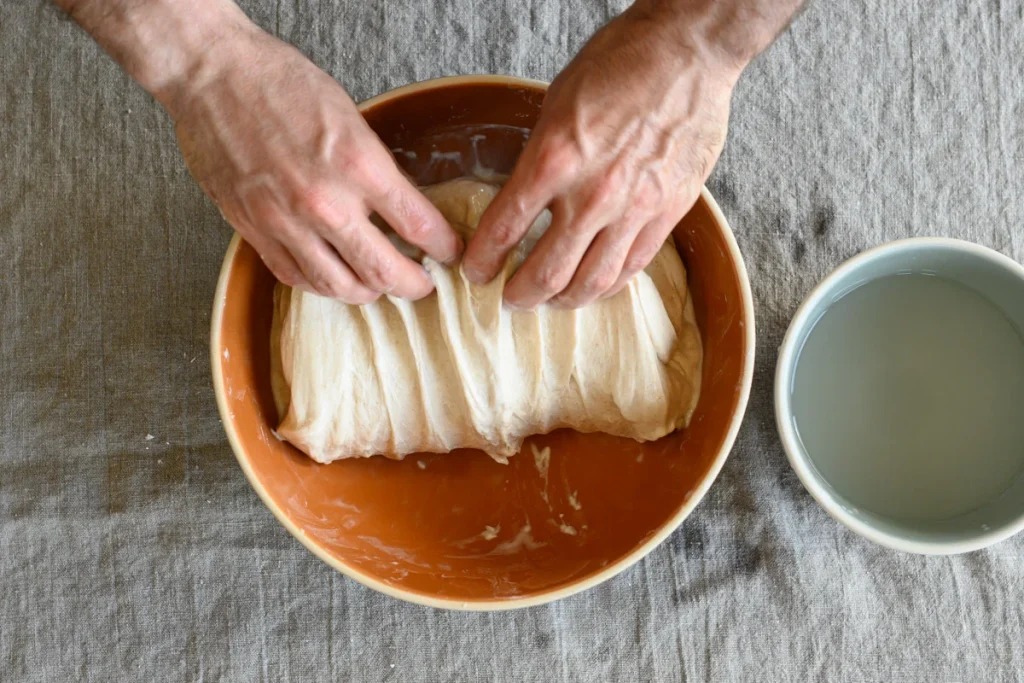
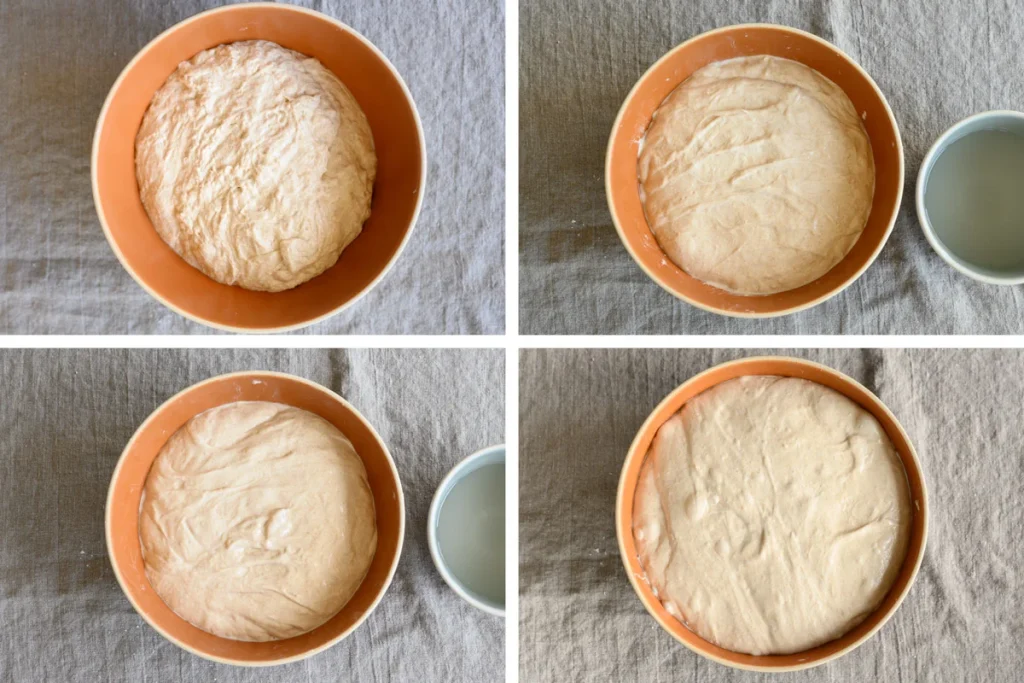
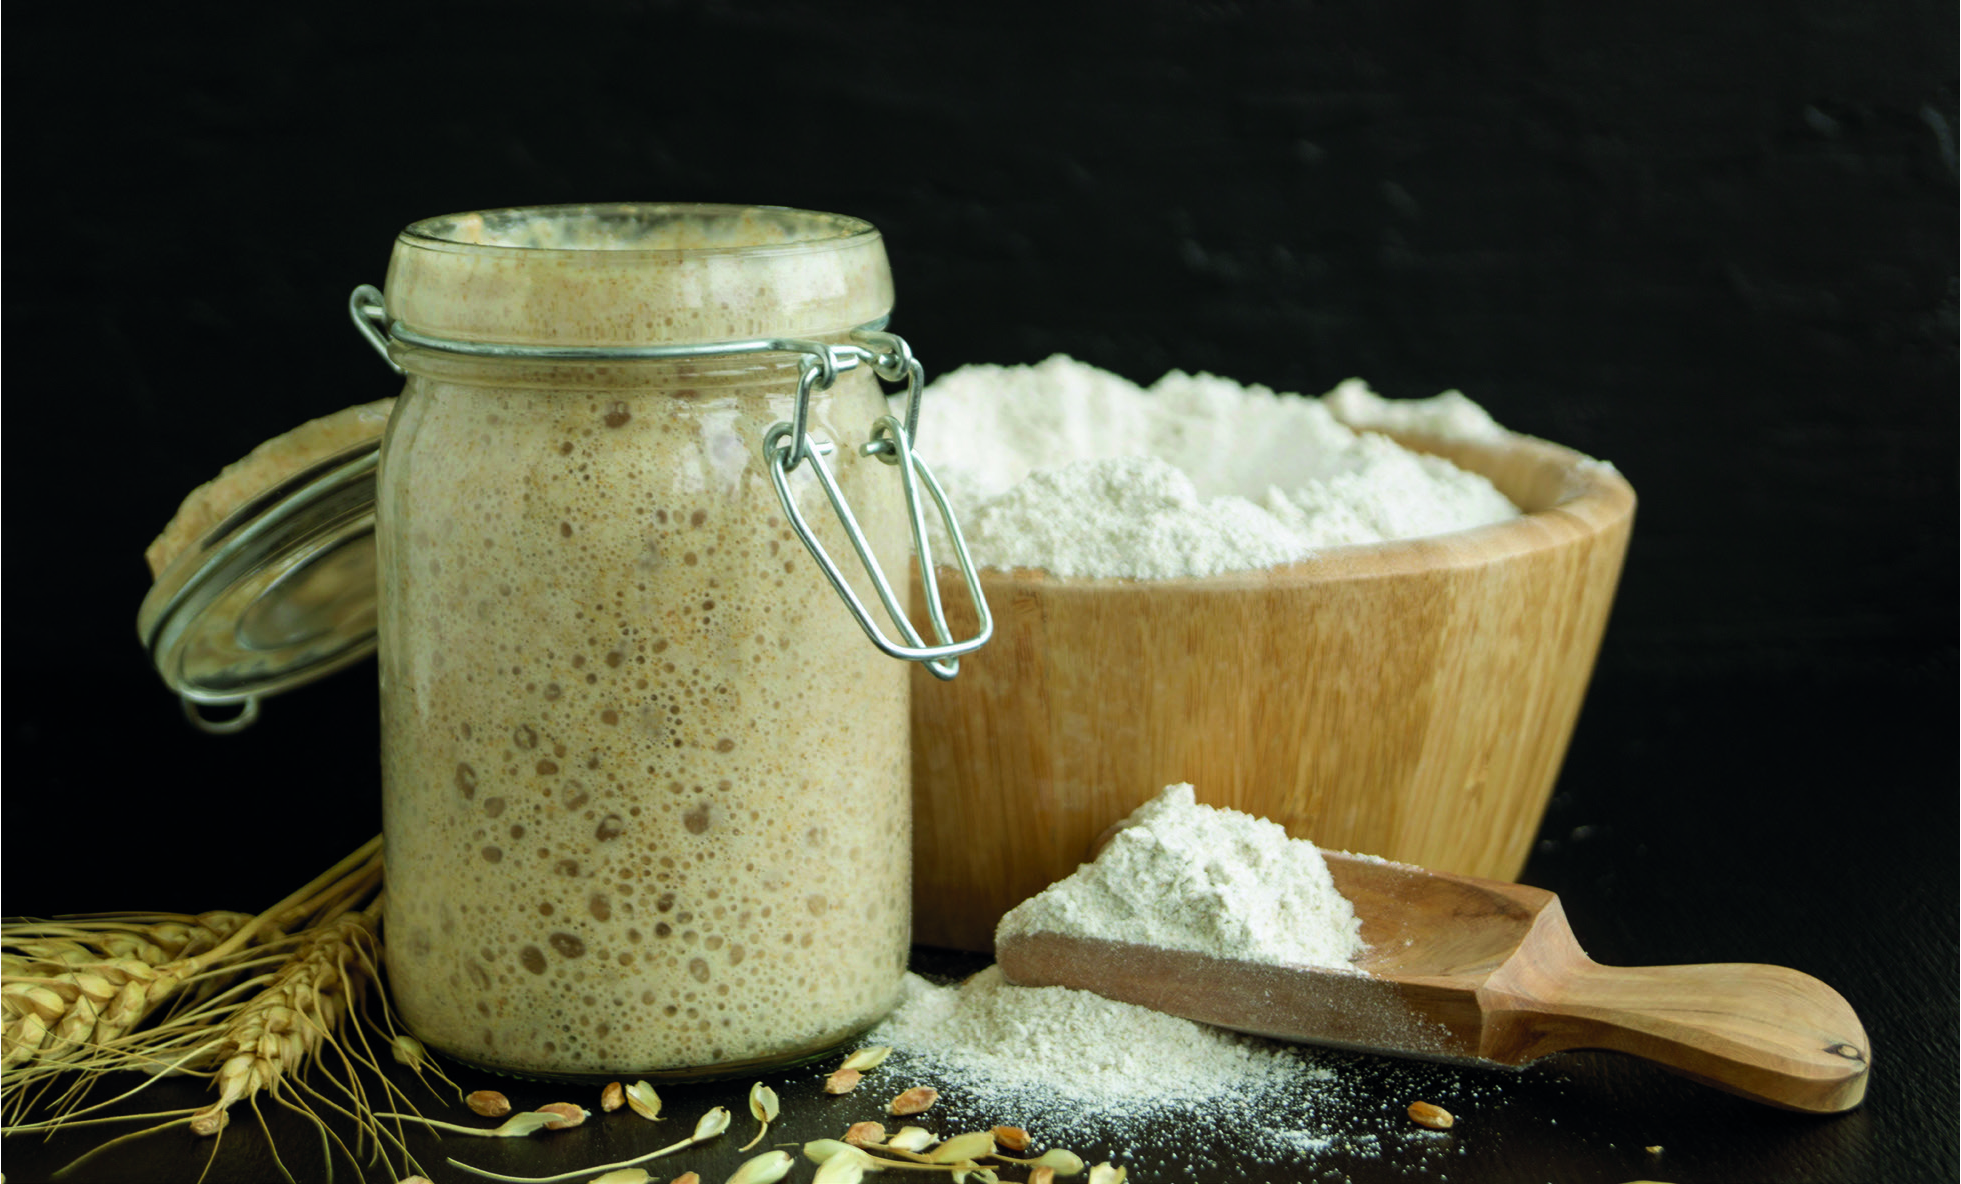
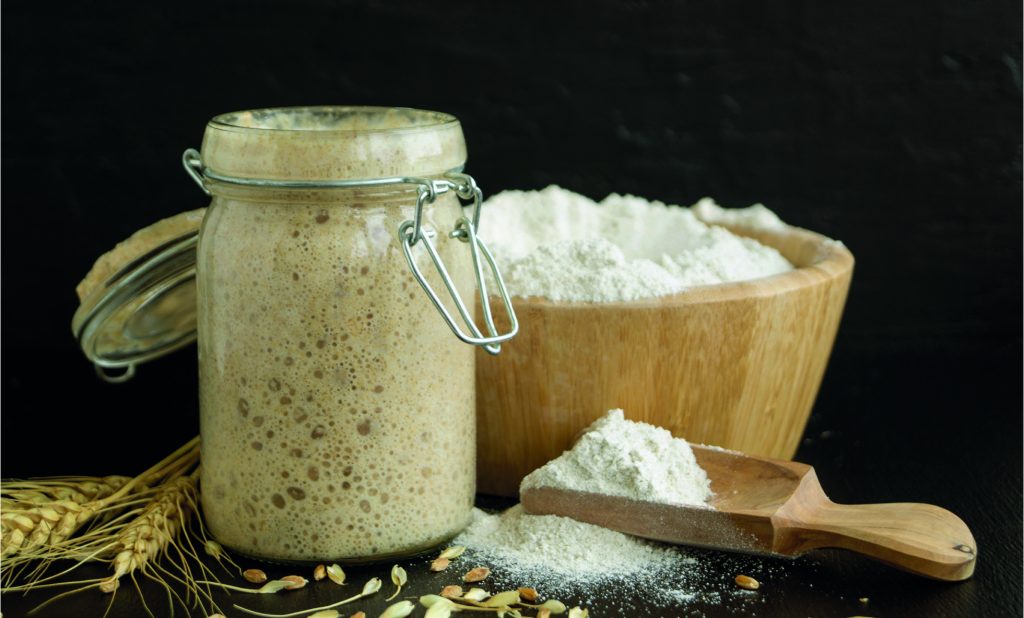
Natural Yeast – Levain (Sourdough)

A mix of flour and water (equal parts) stands in a clean container to attract the wild yeast cells and organic bacteria in the air. Once evidence of activity (bubbles or air pockets visible), a regular feeding process using equal parts of flour and water begins. The action is repeated for the next seven days. The result is that Levain replaces baker’s yeast for dough fermentation. For further details refer to page 71, Part Three on practical baking.

Storage

It is best kept refrigerated during the building stage and upon completion of the starter. Any leftovers from daily production must be returned to the mother and kept under refrigeration.

Must Know

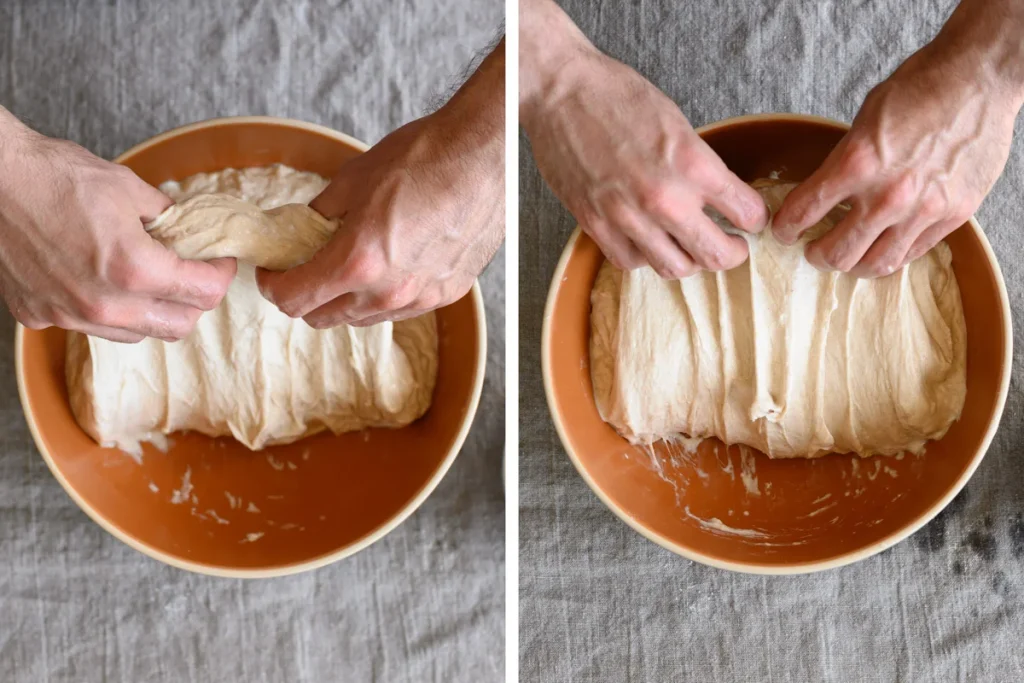
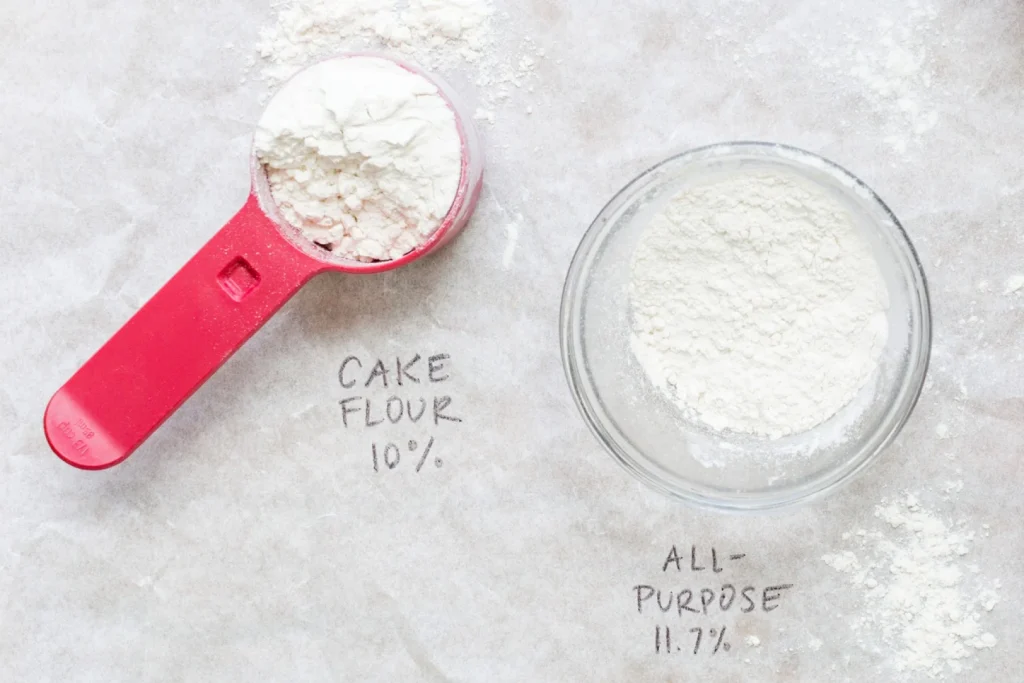
Building the Levain is a slow and steady process requiring care so that the foundation is solid and healthy. Once you have the Levain, you must feed it so it is ready for use before making the dough. The flour used in the starter and feeding must be unbleached, with the most suitable being a medium protein.
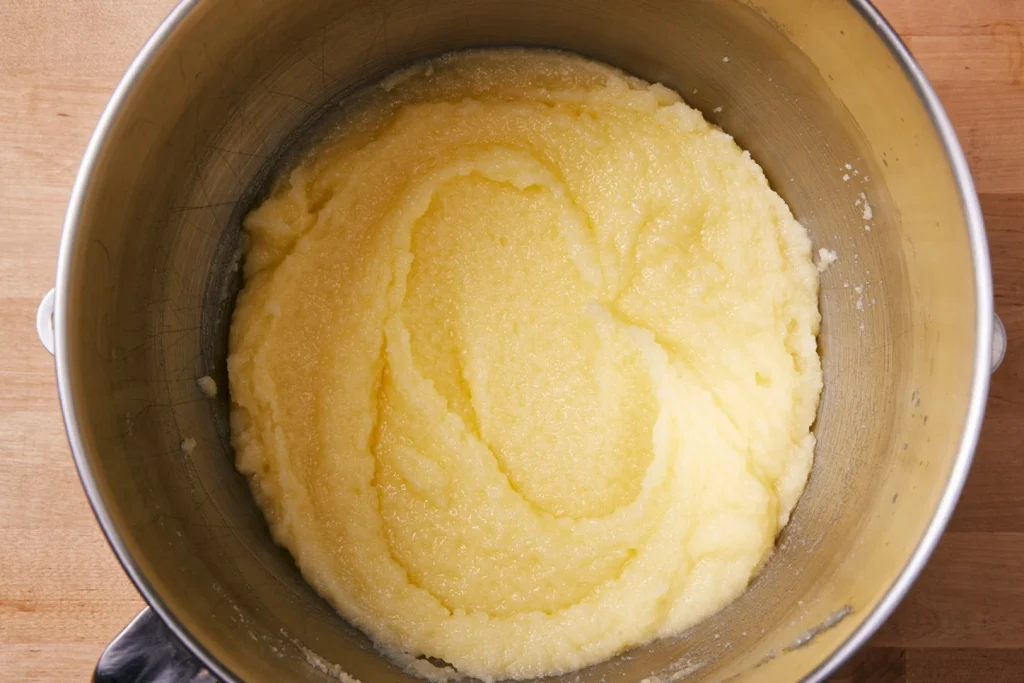
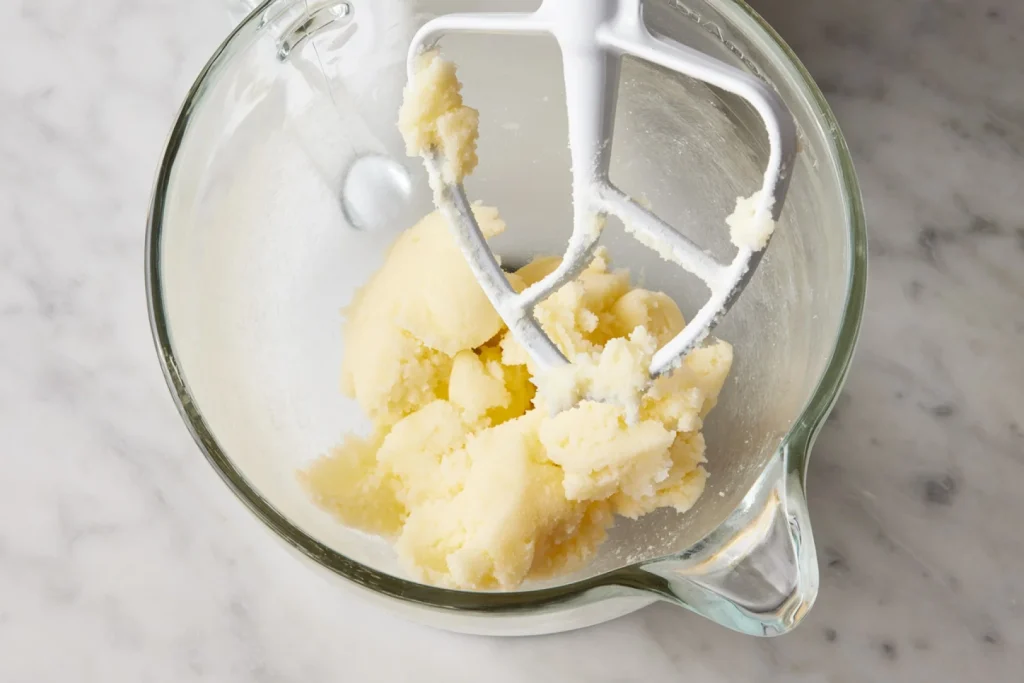
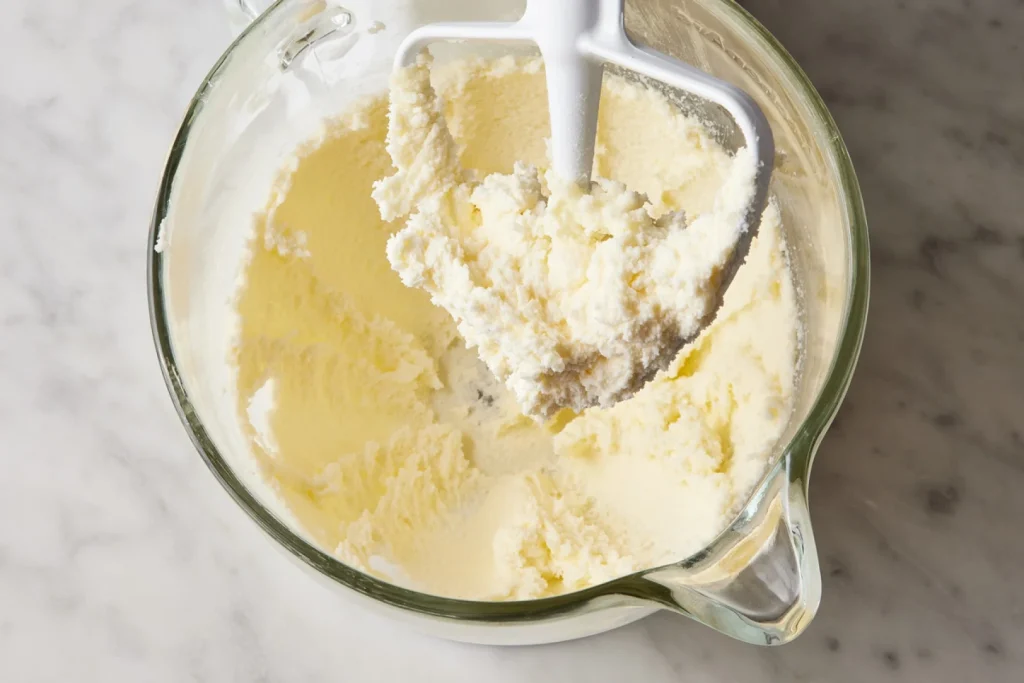
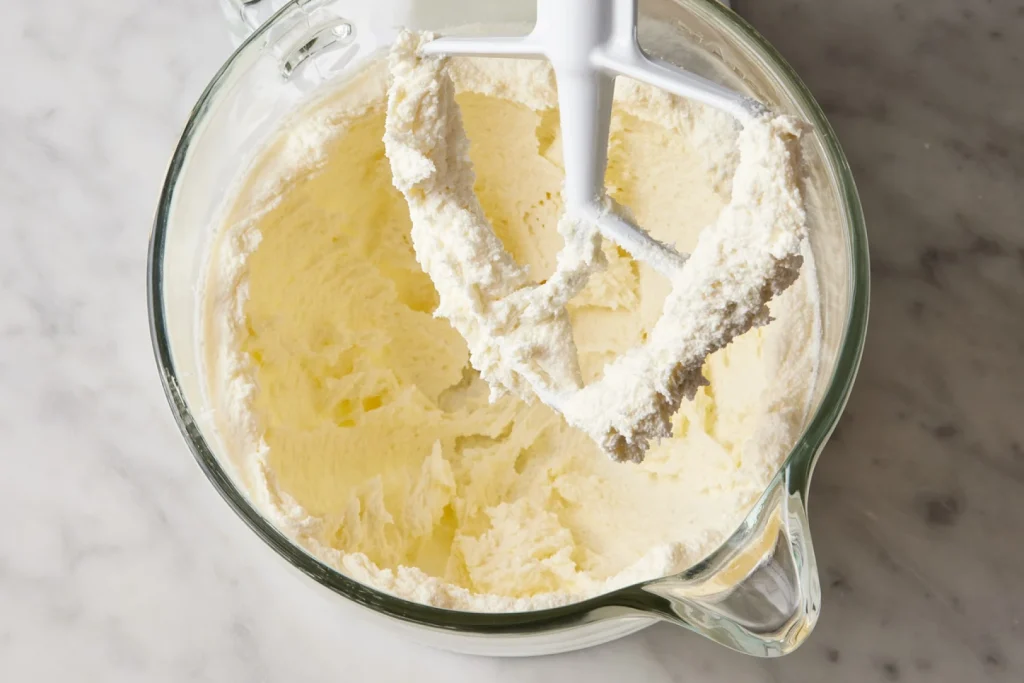
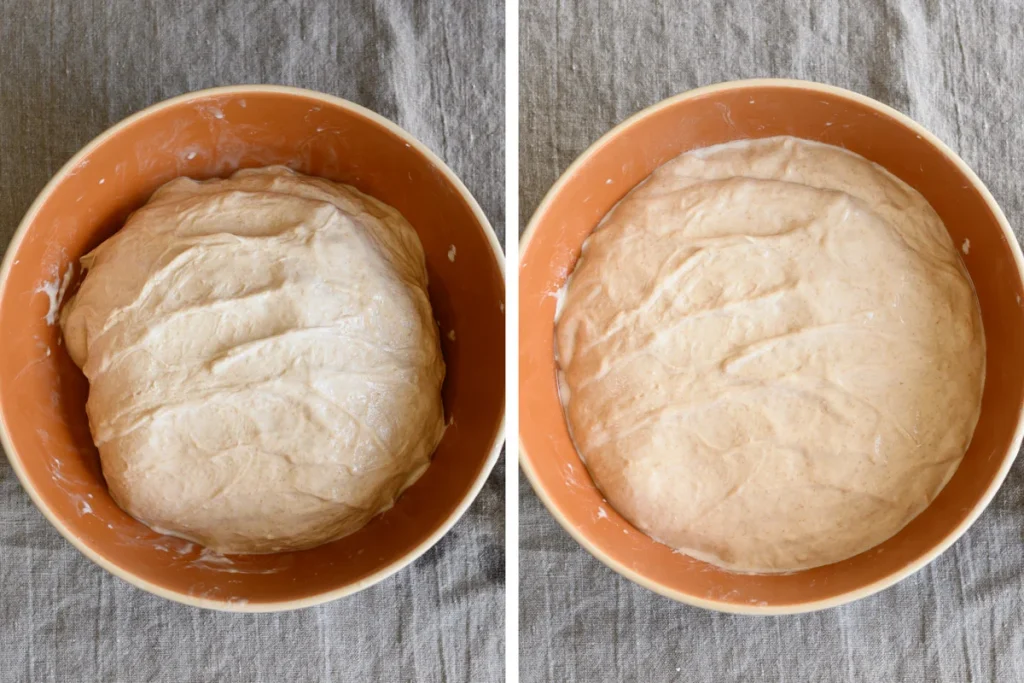
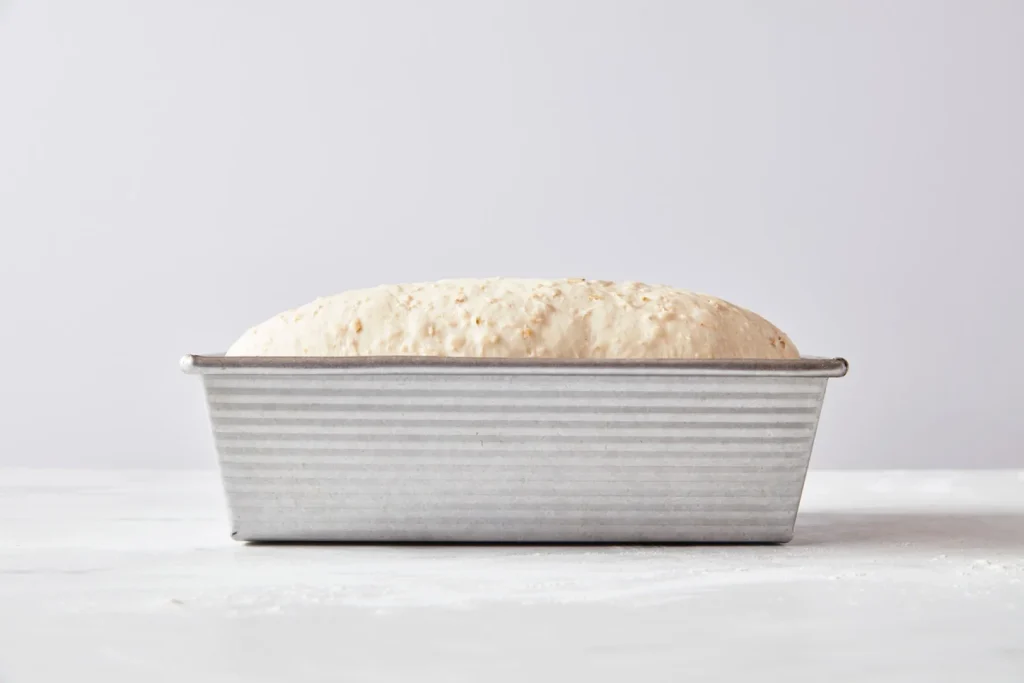
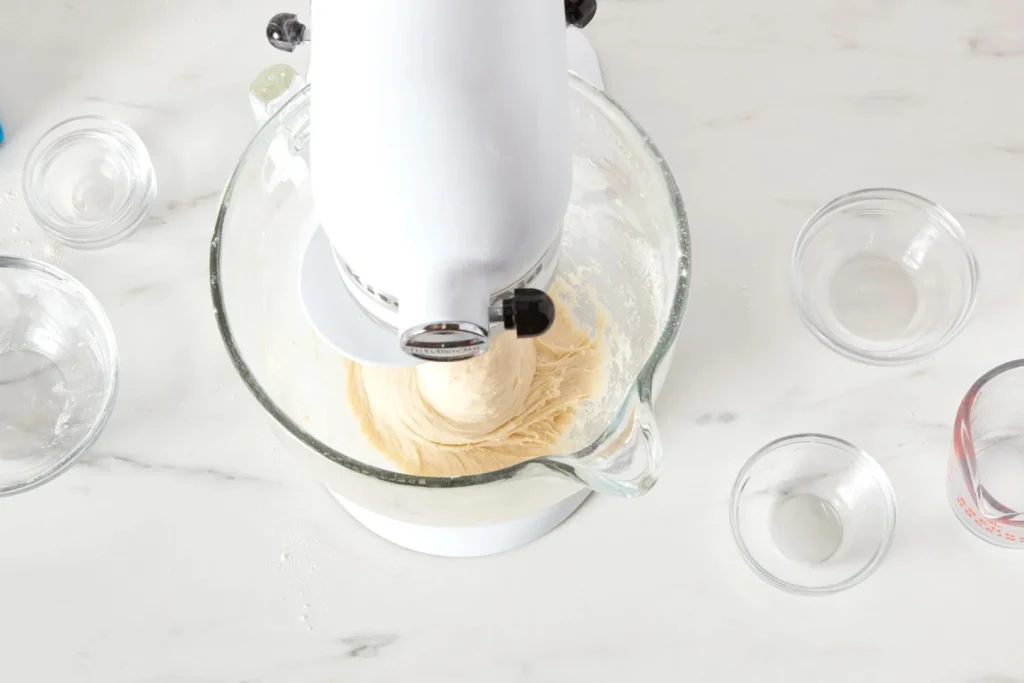
Fermentation

Yeasts are used as an aerator, affecting product structure, flavour, volume, and quality. The yeast’s performance depends on the amount of water, its temperature, and the finished mixing temperature. It will be challenging to control this process as it could move too quickly or slowly at times, so it is crucial to have a clear understanding for success to follow.

Posted on Leave a reply

How to achieve your perfect chocolate chip cookie

How to achieve your perfect chocolate chip cookie

By: izzah zainal | February 16, 2025

A few tweaks — more sugar, a dash of milk — can make cookies crispy, chewy, or cakey.

Good bakers know how to follow recipes. Great bakers know how to tweak them — how to deviate subtly from the printed word and create something that’s not just tasty but tailor-made to your palate. The line between good and great is surprisingly easy to navigate when it comes to chocolate chip cookies. All you need is a little cookie science and a friendly guide to show you the way.

Just a few simple changes can turn a regular chocolate chip cookie into one that’s extra-crunchy, extra-chewy, or extra-cakey. We recommend using our Easy Chocolate Chip Cookies recipe, but these tips are broadly applicable to chocolate chip cookie recipe that makes a similar quantity of finished cookies.

How to make crunchy chocolate chip cookies

Add 2 tablespoons granulated sugar and bake for 2 to 4 extra minutes.

What does the extra sugar do to the cookie dough?

Although sugar may seem like a simple ingredient, it plays a very important and complex role in cookie dough. It contributes to both texture and flavor in many ways: It melts in the heat of the oven to increase spread, and it creates little air pockets in the dough to expand and make cookies rise. Sugar also caramelizes and participates in Maillard reactions to add both color and additional flavor notes, and it recrystallizes upon cooling to give the cookies crispy texture. (Maillard reactions are when amino acids react with sugars to give you the brown color and caramelized flavor in baked goods.)

When adding an extra few tablespoons of granulated sugar, you increase the ratio of sugar to fat and flour in the cookie. This will result in a bit more spread, a larger surface area and more material to caramelize and react and, of course, a little bit of extra sweetness as well, which never hurts.

You may notice that the cookies won’t be crispy immediately out of the oven; that happens later. While the exact science of cookie cooling is still somewhat of a mystery, one theory is that as the molten sugar retreats to its crystalline structure and solidifies, the cookie becomes crispy as opposed to bendy. Working with that theory, we can then understand why the more sugar present to recrystallize, the more snap your cookie will have.

How does granulated sugar act differently than brown sugar?

Granulated sugar contains little to no “invert sugar,” which is what you find in the molasses or refiners syrup added to brown sugar. This invert sugar is actually single monosaccharide molecules that were created by breaking down the double disaccharide molecules that make up granulated or table sugar (sucrose). These monosaccharides possess different chemical properties that make cookies chewier, as we’ll see in the tip below.

Why the different bake time?

By adding extra sugar, you can bake the cookies to a slightly higher temperature without over-baking, which will allow for a crispier final cookie as well as deeper flavor development.

Why not just bake any version longer to get a crunchy cookie without added sugar?

While it’s certainly true that baking any cookie longer will cause it to have a firmer final texture, having the extra granulated sugar allows the cookie to maintain a tender, “snappy,” crisp texture (due to the properties discussed above), as opposed to a less enjoyable hard/crunchy texture.

How to make chewy chocolate chip cookies

Add 2 tablespoons brown sugar.

What does extra brown sugar do to the cookie dough?

While brown sugar is similar to granulated sugar in many ways, it has one major functional component that granulated sugar does not: invert sugar!

The two primary invert sugar monosaccharides found in brown sugar are glucose and fructose, which are actually bound together to make the disaccharide sucrose — what Americans know as our standard white table sugar.

Compared to sucrose, invert sugars caramelize at a lower temperature, and absorb and retain more moisture; fructose is particularly hygroscopic, meaning it really loves to suck up and hold onto water.

Invert sugars also interfere with recrystallization upon cooling, which helps make cookies crisp. By holding that extra moisture and delaying the sugar’s recrystallization, brown sugar has the wonderful ability to give you a moist, bendy, chewy cookie.

Does it make the chocolate chip cookie extra sweet?

While a particularly perceptive taster might be able to tell the difference in sweetness with the additional two tablespoons brown sugar, the overall sweetness level only increased slightly. It’s really just a delightfully sweet cookie at either level.

Do light and dark brown sugar work the same?

In fact, they do. The differences between light and dark brown sugar in terms of the amount or types of syrup used are usually minimal, even though you might expect otherwise given the significant difference in coloration.

How to make cakey chocolate chip cookies

Add 2 tablespoons milk.

What does extra brown sugar do to the cookie dough?

Although it may seem obvious, the most important role extra milk plays is adding a little more liquid. As cookie dough is very low in hydration, that two tablespoons of milk have more of an impact here than in something with higher hydration, such as cake batter.

Milk is around 85% water — and that water will evaporate in the heat of the oven to form steam. This steam will migrate to air pockets created by the melting sugar grains.

As the steam gets hotter, it teams up with gases produced by the leaveners, expanding those air pockets. That expansion causes the cookies to puff and rise in the oven, creating an airy, cakey texture.

The moisture contributed by the milk will also increase spread and hydrate more of the starches in the flour. These hydrated (gelatinized) starches support the structure of the air pocket wall, keeping the cookies from collapsing once cooled. By holding more water, they also help keep the cookies softer over time.

Why milk and not water?

While milk is mostly water, those other little molecules in milk do serve a purpose. First, their presence means that there’s 15% less liquid being added to the dough, and this helps prevent the dough from spreading too far and turning into some less-than-ideal chocolate chip pancakes in the oven.

The proteins in milk — about 3% to 4% — will enhance Maillard reactions (as discussed above) and contribute many of the flavor notes that we recognize as “baked,” giving the cookies their roasted, toasted, and even sometimes nutty notes. Finally, the fat and sugar from the milk also add extra tenderness and richer flavor.

Sugar creamed with warm or melted butter is grainy and greasy.

If your butter is just right

Now that we’ve seen both extremes, let’s check out the results when the butter is at the right temperature. The mixture is lightened in color, it’s visibly fluffy, and it’s not clinging to the sides of the bowl.

Sugar creamed with room temperature butter is pale and fluffy.

Let’s look at the three results side by side. Starting on the left: too cold and the mixture sits in a lump. Too warm, and the mixture spreads out and has an oily layer. Finally, properly creamed, the mixture sits up tall and has visible fluffy peaks.

From left to right: sugar creamed with cold butter, warm butter, and room temperature butter.

Besides looks, the feel of each mixture will be different as well. Under-creamed and your mix will feel like wet sand or damp cornmeal. Over-creamed, and your mix will have the feel of oil and sugar on your fingers, rather like a facial scrub. Your well-creamed mix will be moist and light and the sugar will be nearly dissolved. You’ll barely feel any grit when you rub it between your fingers.

The right mixing speed and duration for creaming

Of course, having correctly softened butter is just one part of the equation, albeit a big one. Mixing at too high or too low a speed and for too short or long a time will also wreak havoc with your creaming. With the advent of the more powerful stand mixers that we use today, gone are the days of having to whip the butter and sugar mixture on high speed for several minutes to achieve good results. Instead, a moderate speed (typically speed 3 to 4 on a stand mixer) for 2 to 3 minutes is sufficient to get the aeration you’re looking for, being sure to scrape the bowl halfway through.

Under-creamed butter and sugar

If you under-cream your butter and sugar mixture, it will remain dense, grainy, and dark in color:

Under-creamed butter and sugar

If you under-cream your butter and sugar mixture, it will remain dense, grainy, and dark in color.

Correctly creamed butter and sugar

Perfectly creamed butter and sugar should be light, fluffy, and pale in color (but not white).

Perfectly creamed butter and sugar

Perfectly creamed butter and sugar should be light, fluffy, and pale in color (but not white).

Over-creamed butter and sugar

If you beat too long and hard, the mixture will be over-creamed, becoming nearly white in color. Because it’s too aerated, it can result in dense, gummy streaks in your cake when baking.

Over-creamed butter and sugar.

Unfortunately, if the butter and sugar has gone this far there’s no going back. We hope you’ve found this information helpful. A picture is worth a thousand words, they say, and we hope these photos and our video will help you achieve the cakes and bakes of your dreams.

Posted on Leave a reply

How to measure flour the right way

How to measure flour the right way

By: RedmanShop | January 22, 2025

If you learn one skill to bake better, it should be how to measure flour — the right way. It’s arguably one of the biggest keys to baking success. That’s because a little too much flour can be the difference between a good bake and a not-so-good bake. And if you’re measuring your flour by volume (i.e., with measuring cups), then it’s very likely you’re adding too much flour.

That’s because measuring flour by volume is wildly inconsistent: It all depends on how densely the flour is packed into the cup. If the flour is more condensed, a cup can hold up to 160 grams of all-purpose flour. If you fluff, scoop, and level, as we recommend, a cup will hold around 120 grams. But if you weigh your flour with a scale? You’ll always get exactly 120 grams of all-purpose flour per cup, precisely as our Test Kitchen (or whoever developed your recipe) intends.

If you succeed in correctly measuring your flour, your baked goods are more likely to be successful, too. And while we recommend always using a scale, using measuring cups works too if you do it the right way. However you choose to measure your flour, here’s how to get it right.

With a scale, your measurements are always accurate.

How to measure flour with a kitchen scale

Hit the “Tare” button to make sure your scale is set to 0 grams. (All of our recipes include gram and volume measurements.) Set your measuring bowl, or a separate empty bowl, measuring cup, or other vessel (whatever you’ll be pouring your flour into) onto the scale, then press “Tare” again to set the scale to 0 grams. Scoop your flour into the vessel on the scale — if you’re measuring 1 cup of all-purpose flour, keep scooping until the scale totals 120 grams. Or measure out however much flour the recipe calls for. (Wondering about the weight of other flours and ingredients? Check out our handy ingredient weight chart.)

Generally, you can stay within 5 grams over or under the written amount (for instance, if the recipe calls for 240 grams of flour and you measured out 245 grams), and it won’t affect your recipe. With that said, we recommend being as accurate as possible when measuring flour and all other ingredients.

How to measure flour with measuring cups

If you don’t have a scale and need to measure flour by volume, it’s important to use the correct technique. Using our “Fluff, Sprinkle, and Scrape” technique is the best way to make sure you do not add too much flour to your recipes.

Begin by fluffing your flour in its bag or container using a spoon or scoop. The goal here is to lighten and aerate the flour. Spoon the fluffed flour into your measuring cup until it’s overflowing. Use a straight edge (like the back of a butter knife or a bench knife) to evenly level off the top so the flour is even with the top of the measuring cup.

Posted on Leave a reply

Bulk fermentation, explained

Bulk fermentation, explained

By: RedmanShop | January 22, 2025

Bulk fermentation (also called the first rise or primary fermentation) is one of the most important steps of yeast bread baking. It begins right when mixing ends and lasts until the dough is divided and preshaped. The name signifies exactly what it is: the step when the dough is fermenting in a large, single mass.

During this time, fermentation creates organic acids and carbon dioxide gases, each of which plays an important part in dough development. Organic acids are primarily what give the dough flavor and strength (acids help condition the gluten network) and carbon dioxide gives the dough volume and lightness.

While our friendly yeast and bacteria are doing most of this work, the dough still benefits from a periodic check-in by the baker. We help regulate dough temperature and strength through a series of folds, and these check-ins also give us an opportunity to assess how the dough is progressing.

Why stretch and fold?

Folding helps add strength to bread dough through a very simple series of actions: stretch the dough out and over itself. This act of stretching and folding, which takes just a few moments, helps develop the gluten network in the dough. Each fold has a significant impact on dough strength.

Through folding, we’re also helping to regulate dough temperature throughout the entire bulk mass. This ensures the dough’s temperature is relatively even throughout — no cool or warm spots at the top or bottom.

And finally, at each set, we have a chance to handle the dough and gain a firsthand assessment on how it’s developing: is the dough sluggish because it’s cool in the kitchen? This means we might need to extend bulk fermentation. Is it strong enough for preshaping or does it need another set of folds? By interacting with the dough in this way, we have an opportunity to answer these questions and adjust course as necessary.

When should I stretch and fold?

This process works best when you perform a quick series of folds and then let the dough rest. In the left-hand image below, you can see the dough bunched tightly in the center after performing a set of stretches and folds. In the right image, you can see it relaxed after a 30-minute rest, ready for another set of folds.

If you try to perform another set too soon, you’ll find the dough is too tight. It’ll be hard to stretch and may even tear. For most doughs, I find spacing out each set by 30 minutes (with the first set happening 30 minutes after the beginning of bulk fermentation) to be just right.

How to fold bread dough

There are many ways to fold bread dough, but my preference is to perform them directly in the bowl. First, get a small bowl filled with water and place it next to your bulk container. Dip your hands in the water before folding to prevent excessive sticking.

You will perform the same up-and-over motion four times, turning the bowl after each fold. As shown above, use two wet hands and grab the side of the dough farthest from you, then lift it up and over to the side nearest your body. Next, rotate your container 180°, wet your hands again if necessary, and perform the same stretch and fold. Next, rotate your container 90°. Grab the side of the dough farthest from you; once again stretch it up and over to the side of the container nearest your body. Rotate your bowl 180° and perform the same fold one final time.To finish the set, I like to gently pick the dough up in the center and let the ends fold under just a little. This helps keep the dough tidy in the middle.

When to end bulk fermentation?

Finding the exact point when to end bulk fermentation takes practice. With time, you’ll learn to read the signs of sufficient fermentation: dough strength, elasticity, smoothness, volume gain, and bubbly appearance.But making this call can be difficult. Cutting bulk fermentation short might mean your dough won’t be sufficiently fermented and you’ll head toward an under-proofed result. On the other hand, if you push bulk fermentation too far, your dough will be hard to handle and on the verge of over-proofing. There’s a balance to be found.Upper left: dough at the beginning of bulk fermentation. Upper right: dough before first stretch and fold. Lower left: dough before second stretch and fold. Lower right: dough at the end of bulk fermentation.

In the image above, see how it initially starts as a shaggy mass, but eventually rises significantly and becomes smooth, strong, and bubbly?At the end of bulk fermentation, I look for a dough that’s risen significantly and is much smoother than when bulk started. If you tug on the dough a little with a wet hand, you’ll feel resistance and elasticity.Additionally, look for liveliness. Gently shake the bowl and it’ll jiggle, letting you know there’s plenty of aeration in the dough. These are all great signs that the dough has fermented sufficiently and is strong enough to be divided.Strong fermentation, sufficient dough strength, ending bulk fermentation at the right time, and a full proof – these are all steps required for a wonderful loaf of bread. And as you develop a sense for how to execute on each of these, you’ll taste the difference in every bite.

Posted on Leave a reply

Cake flour vs. all-purpose flour: What’s the difference?

Cake flour vs. all-purpose flour: What’s the difference?

By: RedmanShop | January 13, 2025

“I want to make a recipe that calls for cake flour, but all I have is all-purpose flour. Can I substitute all-purpose for cake flour?”

If you’ve ever asked this question — to yourself or a friend — you’re not alone. Sometimes we just don’t have the flour a recipe calls for (and can’t bear another trip to the store), or maybe the store was out of stock. So how much does flour choice affect your baking?

The difference between cake flour and all-purpose flour

First, it helps to understand the difference between cake flour and all-purpose flour.

It all comes down to protein content. Every type of flour has a protein percentage, which reflects how much gluten-forming protein it contains. Because protein level correlates with gluten-forming potential, it’s helpful to think of it this way: the higher the protein content, the “stronger” the flour.

When making baked goods like bread, using a strong flour with high protein makes sense. The robust glutinous web that develops when the flour is combined with liquid results in bread with chewy, bouncy texture. But when making a cake, it’s the opposite: We want something with a soft, fine, and tender crumb. In order to get it, we want to discourage gluten development, and one way to do that is to choose a flour with a lower protein content (the other is to avoid overmixing, which further develops gluten, even if you are using cake flour).

Our unbleached cake flour has a protein content of 10%, while all-purpose flour has a protein content of 11.7%. The lower protein content in cake flour means it has less gluten-forming potential, making it better suited to cakes.

(And it’s not just for cake! Our Test Kitchen uses lower-protein cake flour to achieve a melt-in-your-mouth texture in cookies like these Fiori Thumbprint Meltaway Cookies, while these Lemon Sugar Crunch Buns include cake flour for a delicate crumb.)

How to substitute for cake flour

You can make your own cake flour substitute by combining all-purpose flour with a little bit of cornstarch. The cornstarch adds tenderness and lowers the overall protein content of the mixture to mimic that of cake flour.

How to make cake flour : Whisk together 3/4 cup + 2 tablespoons (105g) all-purpose flour and 2 tablespoons (14g) cornstarch. Use in place of cake flour in a recipe, substituting by equal weight or volume.

Can I substitute cake flour for all-purpose flour?

While it’s usually fine to substitute all-purpose flour for cake flour, the opposite isn’t true. “For those bakers out there thinking ‘flour is flour’ — no, it’s really not!” says Molly. She explains, “Subbing cake flour 1:1 into a recipe that was developed for all-purpose flour might result in sunken cake or bars, or cookies that are too delicate or simply fall apart.” That’s because the lower protein content in cake flour may not develop enough gluten or structure to support a baked good meant to be made with all-purpose flour.

To live up to its name, Tender White Cake is made with cake flour.

Start baking with cake flour

Ready to bake great cake? Pick up a box of cake flour and make some of our favorite cake flour recipes:

Posted on Leave a reply

How to assemble and frost a layer cake

How to assemble and frost a layer cake

By: RedmanShop | January 12, 2025

Frosting a cake can be intimidating, but if you break it down step-by-step, there’s nothing to fear. The right tools and techniques will guide you, taking you from naked layers to a frosted beauty without breaking a sweat. The key is to take your time and embrace imperfection. You’ve got this.

Patience makes perfect. Take the time to chill or freeze your baked layers before assembling the cake. The layers will be less fragile, and you’ll have more control and better results with frosting. While they’re chilling, line your serving plate with 2″ to 3″ wide strips of parchment paper.

Trim any dome from the top of the first layer so the cake is flat, then flip it over and place it on your serving plate cut side down.

Pipe a rope of frosting around the outside edge of the cake layer. Refrigerate for 15 minutes so it will become firm. This “dam” keeps frosting or filling from bulging out the side of the finished cake. After the dam sets, fill the top of the layer.

Trim the next layer and place it cut side down over the first. Chill the cake again, if it isn’t cool to the touch.
Smear a very thin coat of frosting on the sides and top of the cake.

This is called the crumb coat. It’s fine if it looks messy, and crumbs are showing through. Refrigerate the cake until you can touch the crumb coat without leaving a fingerprint, 20 to 30 minutes.

Once the crumb coat is firm, cover the top and sides of the cake with a finish coat of frosting. Gently remove the parchment paper strips. Decorate and embellish to your heart’s content.

Posted on Leave a reply

A breakdown of all the different cake mixing methods

A breakdown of all the different cake mixing methods

By: RedmanShop | January 12, 2025

There are so many ways to mix up cake batter. Maybe you’ve always wondered why the many methods; maybe you never thought about it until now. But each technique is based on specific ingredients, and results in a different final product: from a light as air cake, to one that’s sturdy enough to hold up in wedding tiers.

Common ways you might see cake mixing methods written in a recipe:

  • “Cream the butter and sugar together.”
  • “Combine dry ingredients. Add butter and mix until it resembles sand.”
  • “Put all of the ingredients in a bowl and stir together.”

Which way is “best”?

Cake mixing methods

We’ve recently baked cakes using six of the top mixing methods. Read on to see just how different cake results can be, depending on the steps in which the batter is blended.

1) Blended

Cakes made with this method: Very moist; a great candidate for adding mix-ins.

Basically stir together and go, the blended method is the easiest of all cake-prep types. Blended cakes are typically made with oil rather than butter, since oil is much more easily incorporated with the rest of the ingredients. Blended cake batter tends to be more liquid than most; oftentimes the recipe will call to “pour” the batter into the pans, rather than scoop.

2) Creaming

Example: Lemon Bliss Cake Cakes made with this method: Sturdy, yet soft textured. Easy to slice and stack in layers; also ideal for Bundt pans. This cake mixing method is a classic, and the most common.

The creaming method starts with beating the butter and sugar together until they’re lightened in color and fluffy.

Eggs are beaten in one at a time.

The creaming method then adds the dry and liquid ingredients alternately to the butter mixture.

The usual method is a third of the flour, half the milk, a third of the flour, the remaining milk, and finally the remaining flour; it’s helpful to scrape the bowl midway through this process.

Adding flour and liquids alternately ensures all the liquid (usually milk) will be thoroughly absorbed into the batter. If there’s a high amount of butter or other fat in the batter, it’s hard to get the liquid totally mixed in; the alternating technique helps reduce the percentage of fat overall (by adding some flour first). It also facilitates the formation of gluten, which binds the batter together.

3) Foam

Example: Angel Food Cake

Cakes made with this method: Extremely light and airy. This high-rising, somewhat “resilient” cake slices best with a serrated knife or pronged angel food cutter. The leanest cake in the bunch, foam cakes contain little to no fat: i.e. no butter or shortening, and no egg yolks.

Like some sponge cakes, foam cakes contain no leavening, depending on air whipped into the egg whites for structure. The whites are whipped into stiff peaks, usually with cream of tartar added to help with stability and volume.

Flour is carefully folded in, leaving as much air in the batter as possible. Most choose to fold in the flour with a spatula, but we’ve found that using the whisk attachment (the one that just moments before whipped up those whites) incorporates it easily and gently.

4) Paste (also called reverse creamed)

Example: Golden Vanilla Cake

Cakes made with this method: Tighter textured, though still moist. A great candidate for tiers. The most sturdy of the cakes; slices with minimal crumbs. This moist and tender (yet sturdy) cake is an American favorite. Its slightly denser crumb makes it perfect for frosting as a layer cake. Making a cake using the paste method (also sometimes called “reverse creaming”) sounds complicated, but it’s actually one of the most simple techniques of the bunch.

Soft butter and room-temperature liquids are beaten into the dry ingredients until the texture is “sandy.” The butter-coated flour slows the formation of gluten (which starts once flour comes in contact with liquid), and results in a slightly more sturdy cake that still offers soft texture.

Once the batter reaches that crumbly, sand-like consistency, milk and any flavors are added. Then eggs are mixed in one by one. The batter, though pourable, is often thicker than other cake batters.

5) Sponge

Example: Chef Zeb’s Hot Milk Cake

Cakes made with this method: Light and airy, with soft texture. Tend to compress slightly when stacked over two layers high. Mildly sweet, sponge cakes are high-rising and light as air, with the perfect degree of moistness.

Sponge cakes can be made different ways. One way is beating egg yolks and sugar (or whole eggs and sugar) until a very thick foam-like batter is created. The batter is pale yellow in color, and falls off the beater in ribbons. Flour is then gently folded in. Another way is to whip the egg whites separately from the yolks until soft peaks form. The yolk/sugar mixture is beaten until light, flour is mixed in, and then egg whites are gently folded into that mixture. Either way the eggs are prepared, they provide leavening and loft for the sponge cake. This method dates back to before the widespread use of baking soda or powder, when trapped air was a cake’s only leavening.

The batter for sponge cake is very light, airy, and almost soup-like in consistency. Though it may be alarming, this is totally normal. It will bake up into the moist, delicious cake that we know as sponge.

6) Gluten-free

Example: Strawberry Almond Flour Cake

Gluten-free cakes can be made any number of ways and with great success, much like their wheat-y counterparts. As with all recipes, be sure to read the directions carefully before starting. All puns intended, these methods really take the cake. Each one will create a totally different finished baked good – all equally delicious. Tell us, which of these cake-mixing methods do you usually use?

Want to take a deeper dive into cake baking? See our complete guide to cake and cupcakes.

Posted on Leave a reply

Creaming butter and sugar: How to get it right

Creaming butter and sugar: How to get it right

By: RedmanShop | January 12, 2025

For many new bakers and a few veterans, too, cakes are some of the first baked goods we make on our own. We may start with a mix, but then when we realize how easy a cake can be, we branch out to from-scratch cakes and encounter a deceptively simple direction right off the bat: “Cream the softened butter and sugar until light and fluffy.”

Why we cream butter and sugar

In creaming the butter and sugar together, you are using the sugar to aerate the butter and fill it with bubbles that can capture the gasses released by your leavener (usually baking soda and/or baking powder). The more fine bubbles you have in your network, the lighter in texture your cakes will be and the finer the crumb. This is true for your muffins as well, while it makes your cookies light and crisp instead of hard and dense.

How to cream butter and sugar the right way

Just like Goldilocks, we can encounter a variety of issues when dealing with this phrase. Too hard, too soft, and just right. Just what does softened butter look like? Should it be melted? How long do you beat? Should I set my mixer to low or high? How do I know when it’s right?

What your butter should look like before creaming

Not too hard, not too soft — just right.

Your butter should be at room temperature before creaming. But what exactly does that mean? You should be able to press an indent into the butter with one finger, as if you were pressing it into clay. The butter should not be so warm that it’s greasy; it should still be slightly cool, with a bit of resistance when you press it.

The best way to get your butter to room temperature is to leave it out on the counter for a few hours. But if you need to get butter to room temperature quickly? We tested tons of different methods to determine the best one.

Creaming butter and sugar: How temperature makes a difference

Next, let’s explore what will happen if you cream your sugar with butter that’s too cold, too warm, and just right. Up first, butter that’s too cold.

If your butter is too cold and hard

Again, the main reason you want to cream butter and sugar is to use the sugar crystals to punch little holes in the butter and have those holes capture air. Butter that is too cold won’t expand very easily, and it’ll never capture much air. The result? Heavy and dense, the creamed butter will resemble a chunky, grainy spread that’s the consistency of natural peanut butter. There’s also little or no change in color. Properly creamed butter and sugar will be pale yellow in color, but not white (more on this later).

Sugar creamed with cold butter is chunky and dense.

If your butter is too warm and soft

If the butter is too soft or melted, the air bubbles will be created but then will collapse again. This causes a greasy, wet mixture that will result in heavy, soggy cakes. Any air bubbles you’ve managed to create will also be knocked out as soon as the eggs and flour are added. (As a side note, this is also what happens if you try to cream oil and sugar. Leave the oil for recipes that don’t call for the creaming method.)

Sugar creamed with warm or melted butter is grainy and greasy.

If your butter is just right

Now that we’ve seen both extremes, let’s check out the results when the butter is at the right temperature. The mixture is lightened in color, it’s visibly fluffy, and it’s not clinging to the sides of the bowl.

Sugar creamed with room temperature butter is pale and fluffy.

Let’s look at the three results side by side. Starting on the left: too cold and the mixture sits in a lump. Too warm, and the mixture spreads out and has an oily layer. Finally, properly creamed, the mixture sits up tall and has visible fluffy peaks.

From left to right: sugar creamed with cold butter, warm butter, and room temperature butter.

Besides looks, the feel of each mixture will be different as well. Under-creamed and your mix will feel like wet sand or damp cornmeal. Over-creamed, and your mix will have the feel of oil and sugar on your fingers, rather like a facial scrub. Your well-creamed mix will be moist and light and the sugar will be nearly dissolved. You’ll barely feel any grit when you rub it between your fingers.

The right mixing speed and duration for creaming

Of course, having correctly softened butter is just one part of the equation, albeit a big one. Mixing at too high or too low a speed and for too short or long a time will also wreak havoc with your creaming. With the advent of the more powerful stand mixers that we use today, gone are the days of having to whip the butter and sugar mixture on high speed for several minutes to achieve good results. Instead, a moderate speed (typically speed 3 to 4 on a stand mixer) for 2 to 3 minutes is sufficient to get the aeration you’re looking for, being sure to scrape the bowl halfway through.

Under-creamed butter and sugar

If you under-cream your butter and sugar mixture, it will remain dense, grainy, and dark in color:

Under-creamed butter and sugar

If you under-cream your butter and sugar mixture, it will remain dense, grainy, and dark in color.

Correctly creamed butter and sugar

Perfectly creamed butter and sugar should be light, fluffy, and pale in color (but not white).

Perfectly creamed butter and sugar

Perfectly creamed butter and sugar should be light, fluffy, and pale in color (but not white).

Over-creamed butter and sugar

If you beat too long and hard, the mixture will be over-creamed, becoming nearly white in color. Because it’s too aerated, it can result in dense, gummy streaks in your cake when baking.

Over-creamed butter and sugar.

Unfortunately, if the butter and sugar has gone this far there’s no going back. We hope you’ve found this information helpful. A picture is worth a thousand words, they say, and we hope these photos and our video will help you achieve the cakes and bakes of your dreams.

Posted on Leave a reply

The comprehensive guide to baking with yeast

The comprehensive guide to baking with yeast

By: RedmanShop | January 12, 2025

What is yeast, and how is it made?

Yeast is a single-cell organism, part of the fungi kingdom. The yeast we use most often today, Saccharomyces cerevisiae, is one of the oldest domesticated organisms known to mankind: It’s been helping humans bake bread and brew alcohol for thousands of years. Fittingly, the Latin translation of Saccharomyces cerevisiae is “sweet fungi of beer.”

Saccharomyces cerevisiae is just one strain of the more than 1,500 identified species of yeast. But wait, there’s more — literally. Those 1,500 identified yeasts are just an estimated 1% of the yeast population in the world; most species remain as yet unnamed.

In order to have a reliable supply of yeast on hand for all of our baking needs, it’s necessary for manufacturers to “domesticate” wild yeast — stabilizing it, and in the process making it 200 times stronger than its wild counterpart.

Plant scientists working with a yeast manufacturer identify certain characteristics of wild yeast that they decide are desirable, isolate them, and then replicate them. The resulting yeast is given a “training” diet (such as molasses or corn syrup) to make it reproduce and grow. Once the cells have replicated to a critical mass — a process that generally takes about a week — they’re filtered, dried, packaged, and sent off to the market.

What does yeast do?

Yeast makes bread rise. Just as baking soda and baking powder make your muffins and cakes rise, yeast makes breads of all kinds rise — sandwich loaves, rolls, pizza crust, artisan hearth breads, and more.

If you’re baking with yeast, here’s how to tell if your bread dough has risen enough.

How does yeast work?

Since yeast doesn’t reproduce without a good supply of oxygen, it stops reproducing once it’s in dough. Instead, it starts to eat: Sugar (sucrose and fructose) is its favorite food. If there is sugar in the dough, that’s what the yeast eats first; once that’s gone, enzymes convert the starch in flour into sugars for the yeast to consume; thus flour is capable of providing yeast with a continuous food source.

The byproducts of feeding yeast are carbon dioxide, alcohol, and organic acids. Carbon dioxide released by yeast is trapped in bread dough’s elastic web of gluten; think of blowing up a balloon. Alcohol and organic acids disperse throughout the dough, enhancing baked bread’s flavor. As long as moisture and food are available, yeast will continue to eat and produce carbon dioxide, alcohol, and organic acids. If your bread stops rising, it’s usually not because the yeast isn’t working (or has died); it’s because the yeast has run out of food or the gluten has somehow become “leaky” and begun to deteriorate, failing to retain carbon dioxide.

What factors affect how well yeast works?

If you’ve ever baked bread, you’ve probably noticed that sometimes yeast seems to work more quickly than other times. Yeast, like any living organism, is happiest when it’s in a comfortable environment. For yeast, this means plenty of food and moisture; the right pH (acid balance); and the right amount of warmth. Yeast prefers temperatures between 70°F and 100°F; for convenience’s sake, and to produce the most flavorful loaf, it’s best to keep rising conditions on the cooler end of that range, rather than warmer, which can cause the dough to rise too quickly, before it’s had a chance to develop its full flavor.

Salt and sugar can both slow down yeast activity. Each of them is osmotic, meaning they can pull moisture out of yeast cells, thus adversely affecting how the yeast functions. We add salt to yeast dough both for flavor, and to moderate yeast’s work; we don’t want our loaves rising too fast. (See more here: Why is salt important in yeast bread?) Sugar is optional; a little bit makes yeast happy, but too much — generally, more than 1/4 cup per 3 cups of flour — slows yeast down. Cinnamon is also a yeast inhibitor — you can’t use more than 1 teaspoon per 3 cups of flour in a dough without it slowing down the rise significantly.

My yeast didn’t work! Now what?

There are all kinds of reasons why bread fails to rise; weak or dead yeast is one of them. Though you may have just purchased your yeast, it may not have been stored or rotated correctly prior to your purchasing it so that it isn’t, in fact, as new as you think it is. A vacuum-sealed bag of yeast stored at room temperature will remain fresh indefinitely. Once the seal is broken, it should go into the freezer for optimum shelf life. (See “What’s the best way to store yeast?” below.)

A vacuum-sealed bag of yeast stored at high temperatures, however — e.g., in a hot kitchen over the summer, or in a hot warehouse before delivery — will lose its effectiveness fairly quickly. After a while, if stored improperly, yeast cells will die. And if you use dead (or dying) yeast in your bread, it won’t rise.

To make sure your yeast is active before you start mixing, see our blog post: How to test yeast for freshness. Another reason yeast might not work: You may have killed it by using overly hot water in your recipe; water hotter than 139°F will kill yeast. But don’t stress too much about temperature; 139°F is way hotter than is comfortable to the touch. If you stepped into a bathtub of 139°F water, you’d leap out fast. So long as the water you combine with your yeast feels comfortable to you, it’ll be comfortable for the yeast, too.

How much is a “packet” of yeast?

You may find older recipes calling for “1 packet active dry yeast.” A packet used to include 1 tablespoon of yeast; currently, it’s closer to 2 1/4 teaspoons, since improved manufacturing methods now produce stronger, more active yeast.

Can I vary the amount of yeast in a recipe to quicken or slow down how my dough rises?

The amount of yeast you use in your bread dough has a significant bearing on how quickly it’ll rise. By reducing the yeast, you ensure a long, slow rise, one more likely to produce a strong dough able to withstand the rigors of baking. The more yeast in a recipe initially, the quicker it produces carbon dioxide, alcohol, and organic acids. Alcohol, being acidic, weakens the gluten in the dough, and eventually, the dough becomes “porous” and won’t rise, or won’t rise very well.

By starting with a smaller amount of yeast, you slow down the amount of carbon dioxide, alcohol, and organic acids being released into the dough, thus ensuring the gluten remains strong and the bread rises well — from its initial rise in the bowl to its final rise in the oven. Remember that this slow rise extends to the shaped loaf, as well as the dough in the bowl. Once you’ve shaped your loaf, covered it, and set it aside to rise again, it may take 2 hours or more, rather than the usual 1 to 1 1/2, to rise fully and be ready for the oven.

Here are some guidelines to get you started. If you’re an occasional bread baker, cut back the usual 2 to 2 1/4 teaspoons of instant yeast to 1/2 to 1 teaspoon, depending on how long you want to let the dough ferment before the final shape-rise-bake process. 1/2 teaspoon would give you lots of flexibility, such as letting the dough “rest” for 16 to 20 hours; 1 teaspoon would be a good amount for an all-day or overnight rise (10 hours or so, at cool room temperature). If you’re using active dry yeast, which isn’t as vigorous as instant yeast, we’d up the range to 3/4 to 1 1/2 teaspoons.

I’ve heard that when you’re doubling a recipe, you shouldn’t double the yeast, too. Is that true?

You can increase the size of most bread recipes by simply doubling, tripling, etc. all of the ingredients, including the yeast. Depending on the recipe and rising time, you may use as little as 1 teaspoon, or up to 2 1/4 teaspoons (sometimes more) of instant yeast per pound (about 4 cups) of flour.

That being said, many home recipes, particularly older ones, use more yeast than this; so when you double or triple the yeast, you may find that your dough is rising too fast — faster than you can comfortably deal with it. In addition, if you’ve increased your recipe by five times or more, and also increased the yeast by five times, keep in mind the time it will take you to shape the dough. You may find the rising dough outpaces your ability to get it shaped and baked. If that’s the case, make a note to reduce the amount of yeast next time.

What’s the difference between active dry yeast and instant yeast?

In days gone by there was a significant difference between active dry yeast and instant yeast. Today, the difference is minimal, and the two can be used interchangeably — with slightly different results. Let’s look at active dry yeast first.

Active dry yeast

Originally, the classic active dry yeast manufacturing process dried live yeast cells quickly, at a high temperature. The result? Only about 30% of the cells survived. Dead cells “cocooned” around the live ones, making it necessary to “proof” the yeast — dissolve it in warm water — before using.

These days, active dry yeast is manufactured using a much gentler process, resulting in many more live cells. Thus, it’s no longer necessary to dissolve active dry yeast in warm water before using — feel free to mix it with the dry ingredients, just as you do instant yeast.

Active dry yeast, compared to instant yeast, is considered more “moderate.” It gets going more slowly, but eventually catches up to instant — think of the tortoise and the hare. Many bread-bakers appreciate the longer rise times active dry yeast encourages; it’s during fermentation of its dough that bread develops flavor.

Fleischmann’s and Red Star are the two brands of active dry yeasts you’re most likely to see in your supermarket.

Instant yeast

This yeast is manufactured to a smaller granule size than active dry. Thus, with more surface area exposed to the liquid in a recipe, it dissolves more quickly, and gets going faster than active dry. While you can proof it if you like, it’s not necessary; like active dry yeast, simply mixing it into your bread dough along with the rest of the dry ingredients works just fine.

One caveat: In dough that’s high in sugar (generally, more than 1/4 cup sugar per 3 cups of flour), the sugar evens things out, and instant yeast and active dry yeast will perform the same. (For very sweet breads, you might want to consider using SAF Gold Instant Yeast; for more on that, read below.)

Can I use active dry and instant yeasts interchangeably?

Yes, they can be substituted for one another 1:1. We’ve found that active dry yeast is a little bit slower off the mark than instant, as far as dough rising goes; but in a long (2- to 3-hour) rise, the active dry yeast catches up. If a recipe using instant yeast calls for the dough to “double in size, about 1 hour,” you may want to mentally add 15 to 20 minutes to this time if you’re using active dry yeast.

When dough is rising, you need to judge it by how much it’s risen, not how long it takes; cold weather, low barometric pressure, and a host of other factors affect dough rising times, so use them as a guide, not an unbreakable rule.

One time when you might not want to use instant and active dry yeasts interchangeably is when you’re baking bread in a bread machine. Since bread machines use a higher temperature to raise dough, substituting instant for active dry yeast 1:1 may cause bread to over-rise, then collapse. When baking in the bread machine and substituting instant yeast for active dry, reduce the amount of instant yeast by 25%.

RapidRise, instant, bread machine yeast … is there truly any difference?

Bread machine yeast and instant yeast are the same yeast. RapidRise, Fleischmann’s branded instant yeast, is also an instant yeast, but a different strain than SAF or Red Star.

We find RapidRise is faster out of the gate than SAF or Red Star, but it gives out sooner. And since we like to give our loaves leisurely rises (a long rise brings out bread’s flavor), we like SAF or Red Star.

What’s gold yeast?

SAF Gold Instant Yeast, another SAF variety, is an “osmotolerant” yeast, perfect for sweet breads and any dough with a high amount of sugar. SAF Gold works best when the amount of sugar is between 10% and 30% of the amount of the flour, by weight (this is called a “baker’s percentage”). So, for a 3-cup-flour loaf (360g flour), you’d choose SAF Gold if the sugar is greater than 3 tablespoons, or up to about a heaping 1/2 cup. Understand that the greater the amount of sugar, the more slowly your dough will rise.

How does SAF Gold work? Sugar likes to absorb water; and when there is sugar in bread dough, it pulls water away from yeast, leaving the yeast thirsty. The yeast cells in SAF Gold are bred to require less liquid to function, so they’re better able to withstand sugar’s greedy ways with water.

SAF Gold is best used in sweet breads; for “lean” doughs (low in sugar and fat), SAF generally recommends red-label yeast.

What’s fresh yeast?

Originally, fresh yeast was the only yeast option, until dried yeast arrived on the market in the 1940s. It comes in a moist, firm block with the consistency of clay. Fresh yeast lends a slightly sweeter, richer flavor to baked goods compared to dry yeast. One downside, though, is its short shelf life: Unlike dry yeast, it’s highly perishable and must be stored in the refrigerator. Even then, it usually only lasts about a week or two — opened or unopened.

Despite these differences, both fresh and dry yeast perform the same function in baking, and fresh yeast will make your bread rise just like dry yeast. For more info on fresh yeast and how to convert between fresh and dry yeast, see our previous post: How do I bake with fresh yeast?

What’s the best way to store yeast?

We recommend transferring dry yeast (not fresh) to an airtight container (glass or acrylic) and storing it in the freezer for up to a year. If you buy yeast in bulk (e.g., a 1-pound vacuum-packed brick), open it up; divide it into three or four smaller portions, and store each in a tightly closed container. A zip-top freezer bag works well.

When you’re ready to use yeast, remove the bag or jar from the freezer, spoon out what you need, and quickly return it to the freezer. Yeast manufacturers say you should let frozen yeast rest at room temperature for 30 to 45 minutes before using; frankly, we’re usually too impatient to do that, and have never experienced any problem using yeast straight from the freezer.

Posted on Leave a reply

Make your best cookies with these 10 tips

Make your best cookies with these 10 tips

By: RedmanShop | January 11, 2025

1) Weigh, don’t scoop, your flour

A little too much flour can be the difference between a dry, cakey cookie and a fudgy, chewy one. And if you’re weighing your flour by volume (i.e., with measuring cups), then it’s very likely you’re adding too much flour.That’s because measuring flour by volume is wildly inconsistent: It all depends on how densely the flour is packed into the cup. If the flour is more condensed, a cup can hold up to 160g of flour. If you fluff and scoop, as we recommend, a cup will hold around 120g.

Don’t have a scale? Buy one now! In the meantime, here’s how to measure flour correctly by volume.But if you weigh your flour with a scale? You’ll always get exactly 120g of flour per cup, precisely as our Test Kitchen (or whoever developed your recipe) intends. Which translates to cookies with the perfect texture, whether that’s chewy chocolate chip cookies or crumbly, buttery shortbread.

2) Ensure your butter is the right temperature

Here’s a common ingredient line in cookie recipes: 8 tablespoons (113g) unsalted butter, at room temperature.Don’t ignore those last three words! Butter needs to be the correct temperature to cream with sugar (more on that below), which means it should be right in the Goldilocks zone — not too hot and soft, and not too cold and hard.

But what exactly does room temperature mean? You should be able to press an indent into the butter with one finger, as if you were pressing it into clay. The butter should not be so warm that it’s greasy; it should still be slightly cool, with a bit of resistance when you press it. The best way to get your butter to room temperature is to leave it out on the counter for a few hours. But if you need to get butter to room temperature quickly? We tested tons of different methods to determine the best one.

This is what creamed butter and sugar should look like.

3) Cream correctly

Typically, one of the first steps when making cookie dough is to cream butter and sugar together. This process aerates the mixture — the hard sugar crystals cut through the room-temperature butter, creating tiny pockets of air that help leaven the cookie when it bakes. If you don’t cream butter and sugar long enough, it will still be gritty and dense, which may result in grainy cookies that don’t puff or spread. Meanwhile, if you cream butter and sugar for too long, it will introduce too much air, causing your cookies to potentially puff excessively and become cakey while baking. Properly creaming should take about four minutes on medium speed in a stand mixer, until the mixture is pale and fluffy.

4) Don’t substitute granulated sugar for brown sugar

Sugar is sugar, right? Nope! Brown sugar is white granulated sugar with molasses added back in — up to 10% molasses, by weight. This translates to several key differences in your cookie baking. Besides adding caramelized flavor and golden color to cookies, brown sugar is acidic and lowers pH — which is important to activate baking soda, a leavener typically called for in recipes that use brown sugar. (Low pH brown sugar + high pH baking soda = the reaction of leavening.) Using granulated sugar instead would require tinkering with acid levels and leaveners to achieve the same reaction. What’s more, if you use white sugar in place of brown, your cookies may spread less (or more, depending on the other ingredients in the recipe).

5) Don’t skip (or shorten!) the chill

Chilling cookie dough can be annoying — do you really want to wait longer for freshly baked cookies? But as tempted as you may be to skip this step, don’t. It’s crucial for many reasons: Chilling cookie dough controls spread, concentrates flavor, and creates cookies with chewy/crisp (rather than soft/doughy) texture. Skipping or shortening that chill may result in thin cookies with less browning and blander flavor. So wait the extra 30 minutes — it’s worth it.

Use a cookie scoop to portion dough with ease (and bake on a nonstick cookie mat to control spreading).

6) Make scooping seamless

For a uniform appearance and an even, circular shape in all your cookies, use a cookie scoop to portion out the dough. You can choose your preferred size — small, medium, or large — then scoop and drop in half the time it takes to do so with a spoon.

And a bonus tip: If your cookies still turn out a little wonky, you can use a drinking glass to transform them into perfect circles. When the baked cookies are just out of the oven and still hot, take a wide-mouthed drinking glass and turn it over to cover the cookie. Move the glass in a circle, rounding the cookie’s edges as you do so to smooth it into an even shape.

7) Line your pan the right way

It matters how you line your pan, and we’ve done the baking to prove it. In an experiment testing five different pan lining methods against each other, cookbook author Jesse Szewczyk found that cookie spread varied wildly depending on how the pan was lined. A greased baking sheet caused unsightly dark bottoms and burned edges, while an ungreased, unlined baking sheet put cookies at the risk of sticking. Baking on aluminum foil caused the cookies to spread extensively and become thin and crispy.

When lining your pan to bake cookies, we recommend two methods. A good, safe bet is to use parchment paper. The cookies spread just enough while maintaining a nicely domed center. For even more consistent results, baking on a nonstick mat resulted in perfectly shaped cookies that spread just the right amount.

Leave at least several inches between scoops of cookie dough.

8) Give your cookies space

Cookies tend to spread more than you think they will. So as much as you may want to knock out an entire batch of dough at once, resist the urge to crowd them on the baking sheet. Instead, leave several inches in between each ball of dough. Otherwise, the cookies can spread and run into each other, transforming them into messy shapes and ruining the contrast between crispy edges and chewy centers.

And for extra insurance, follow the next tip, then space cookies based on what you learn there …

9) Bake a batch of test cookies

Before placing all your dough in the oven and hoping for the best, bake one or two test cookies before scooping and baking the entire batch. That way you can do a complete initial assessment of:

  • How much do the cookies spread (or not spread)?
  • What size are they (too big, too small, just right)?
  • How do they taste (do they need a bit more salt, or cinnamon)?
  • What’s their texture (crispy, crunchy, chewy, soft)?
  • Does the given baking time work for your oven (were they burned, or underdone)?
  • Does it matter if you cool the cookies on a pan vs. on a rack?

Adjust accordingly before baking the full batch to guarantee your best bake.

For a soft — not snappy — interior, make sure you pull your cookies from the oven at the correct time.

10) Don’t overbake

It’s always best to err on the side of underbaking a cookie, instead of overbaking. Typically, cookies should still look a little underdone when you pull them from the oven — that’s because they’ll continue to bake on the hot baking sheet, and they’ll settle and firm up as they cool. You want to remove your cookies from the oven once they’re just set in the middle, with golden brown edges. If you’re unsure what “set” looks like, keep an eye on their shine. If the dough is shiny as it bakes (thanks to the butter or other fat in it), that shine will significantly reduce or go away once the cookies are set. As soon as they reach that stage, remove them from the oven. Even if they don’t feel firm yet, they’ll continue to set and harden as they cool.

Ready to bake your best cookies yet? Find your next recipe with our collection of Classic Cookies.

Subscribe to our Newsletter Now

Get the latest recipes, products and classes available on RedManShop.