FREE DELIVERY ABOVE $60

Posted on Leave a reply

How to tell if bread is done baking

How to tell if bread is done baking

By: RedmanShop | January 11, 2025

After all the work it takes to make bread, not to mention time (sometimes multiple days!), the last thing you want to do is stumble at the final hurdle. But that’s exactly what can happen if you underbake your bread — resulting in a gummy, dense crumb — or overbake it, causing it to harden and dry out.

Should I use temperature to test my bread for doneness?

You can. Many of our recipes call for loaves to be baked to a specific internal temperature, as measured on an instant-read thermometer. (For specifics, check out this blog post: Using a thermometer with yeast bread.) But as a seasoned bread baker, Barb recommends methods that pros, home bakers, and grandmas alike have been using for centuries.

“I learned to bake bread at an artisan bakery, and we never took the temperature of our breads,” Barb says. “Professional bakers simply don’t tend to use this method. Instead, I encourage bakers to learn to use their senses to guide them: the aroma, color, feel, and sound of the loaf can provide all the confirmation you need that your bread is fully baked.”

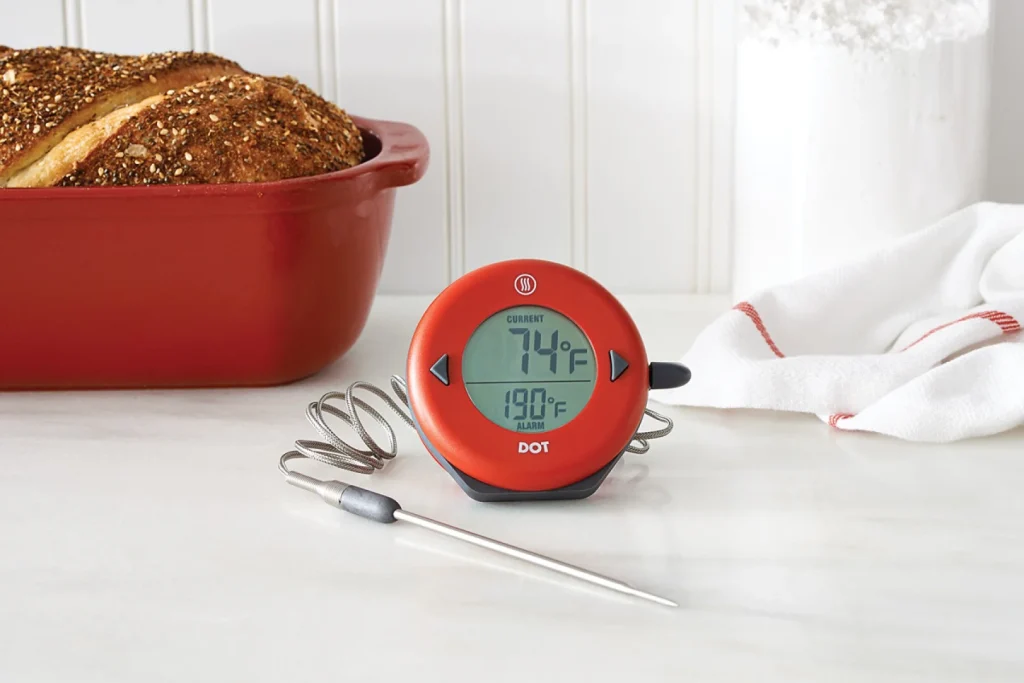
An instant-read thermometer can measure the internal temperature of your loaf.

Use your senses to gauge doneness (more on that below!), and then turn to a thermometer as a way to confirm your instincts and ensure the bread is fully baked. It’s a secondary tool, rather than the only one. This is especially important because the center of a loaf can reach its “finished” baking temperature several minutes before the end of baking time, so only using temperature can sometimes be misleading.

Use your senses: Smell

“Just like other baked goods, when the delectable aroma of homemade bread starts wafting through your kitchen, that’s a good sign that your bread is close to being done,” advises Barb. Don’t stray too far from your oven at this point!

Use your senses: Sound

“For crusty artisan bread, one way to determine doneness is by thumping the bottom of the loaf,” says Barb. “Give it a few quick knocks on the bottom of the loaf with your knuckles; if it sounds hollow, that tells you it’s fully baked.”

Use your senses: Touch

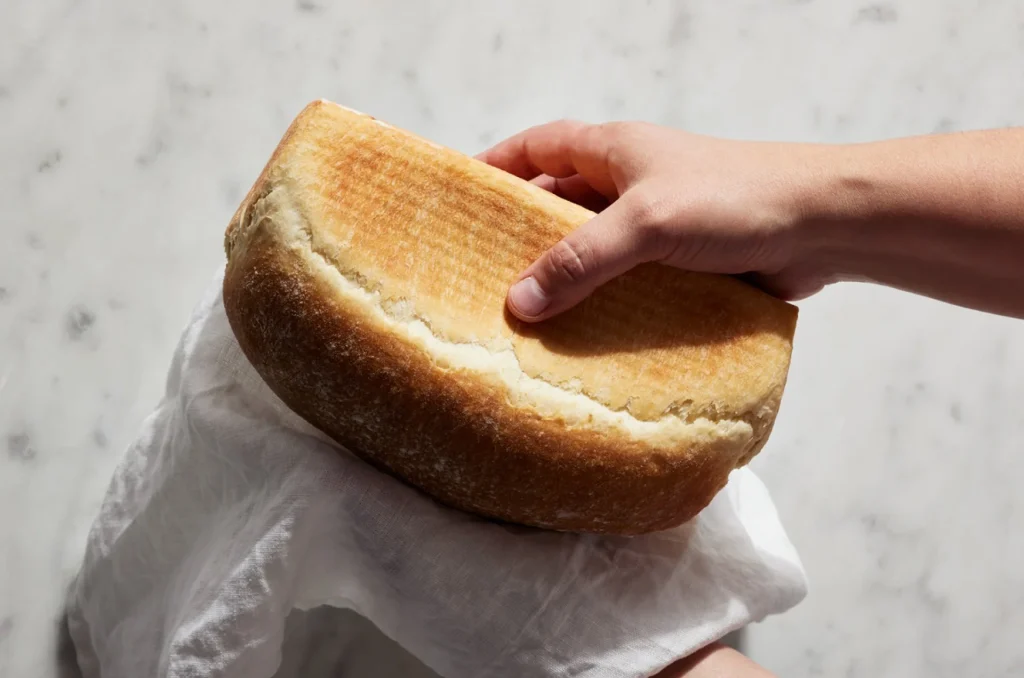
No matter what type of bread you’re baking, the finished loaf should feel noticeably lighter in weight than the dough did. “Bread loses quite a bit of water weight as it bakes,” Barb explains. “Moisture loss can vary from one type of bread to the next, but expect at least 15% weight reduction for most breads.”

If you ever take an artisan bread class at  Baking School, you’ll learn that when crusty loaves of bread (think baguettes or boules) are pulled out of the oven, they should have extremely firm crusts that only yield when squeezed very hard.

Use your senses: Sight

Crust color is a clear visual indicator of bread doneness, but Barb says different types of bread have varying levels of color to look for.

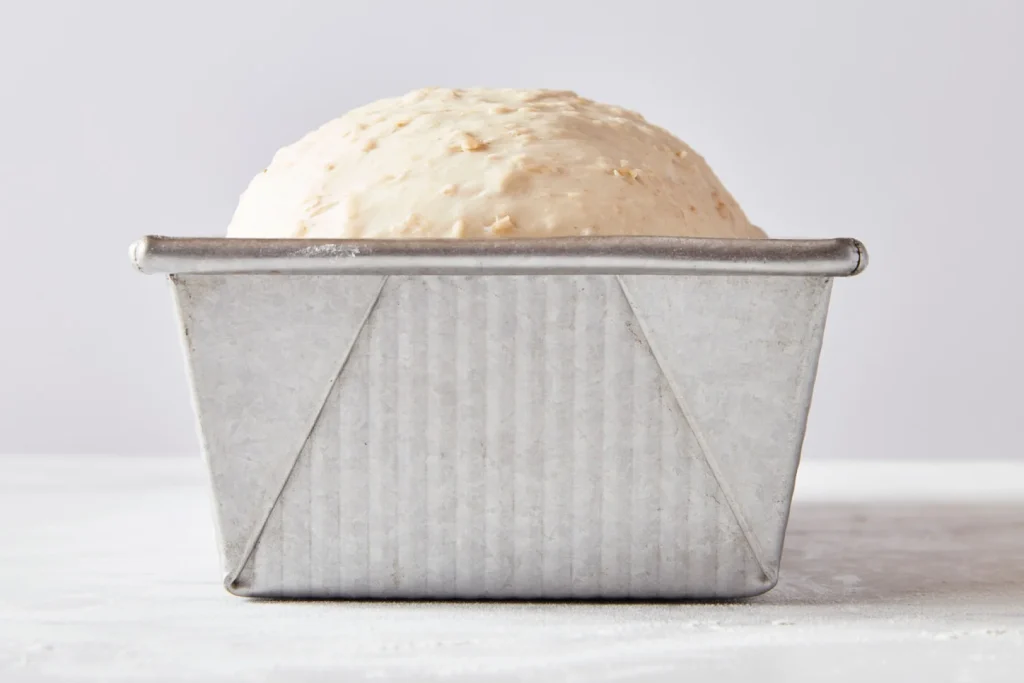
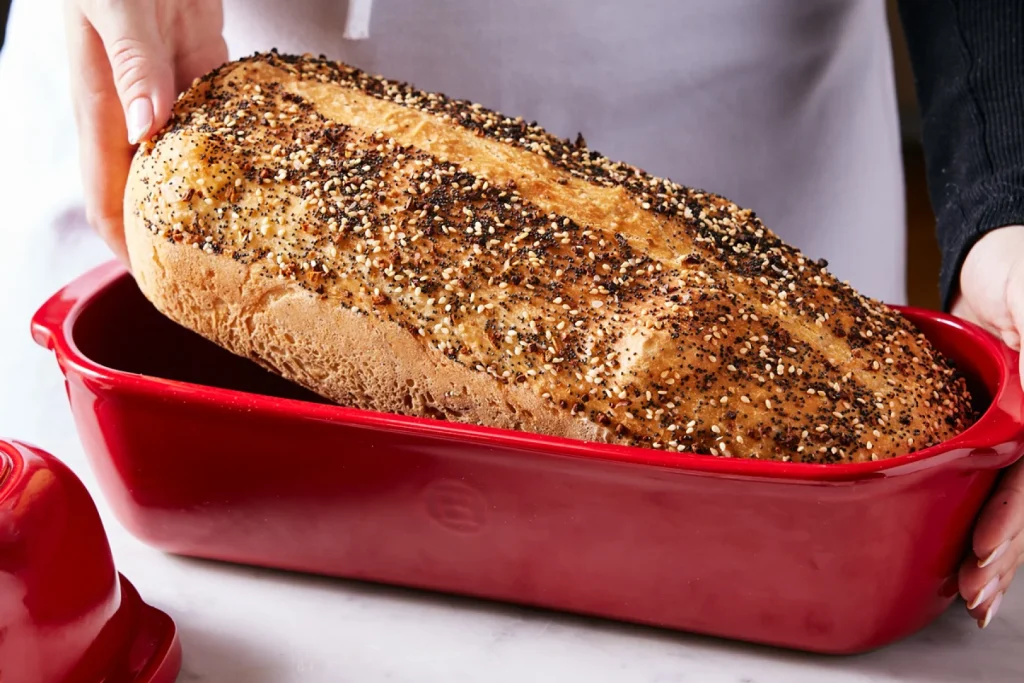
Sandwich bread and pan loaves: “The color should be a rich golden brown and the top crust should feel firm. Don’t be afraid to tilt the loaf out of the pan to be sure the sides and bottom are also nicely golden brown and sturdy.”

Challah or other free-form enriched loaves : “Look for the lightest part of the loaf (between the braids or an area that isn’t egg-washed) to have taken on some color. It won’t be as dark as the egg-washed surface, but it shouldn’t look too pale or doughy either. Look for a lighter golden brown in these areas. Check the bottom of the loaf for color and firmness as well.”

Brioche : “This one can be tricky because you really need to bake to a rich brown color for the interior to be fully baked, since the butter and sugar causes brioche to brown more quickly. Take your bread out when the crust is a deep mahogany and don’t be afraid! Color means flavor.”

Crusty artisan loaves and sourdough : “Dark color translates to more flavor, so I go a bit darker with these types of breads. Our Baking Ambassador Martin Philip shares helpful intel in a great article on this subject,” Barb recommends. One takeaway: Look for a little strip of char on the loaf’s ear, like it’s wearing eyeliner.

And just because your bread is finished baking, that doesn’t mean it’s done

It’s important to remove your bread from the oven at the correct time, and it’s handy to have your thermometer to check the internal temperature, but that’s not all it takes to nail the perfect bake.

“Remember that bread isn’t fully done when it comes out of the oven,” advises Barb. “Moisture continues to be released as bread cools, and the internal structure of the loaf needs that time to set completely. Unless you want to end up with a gummy interior, let your bread cool completely before slicing into it.” (Moist, dense rye breads with a high percentage of rye flour often benefit from up to 24 hours of cooling time!)

In the end, the best way to develop your baking sixth sense is to keep practicing, paying attention to these cues each time. “I know trusting your senses can seem difficult at first,” says Barb, “but this is one of those baking skills that will improve with every loaf you bake!”

Posted on Leave a reply

What is proofing bread? And how do I get it right?

What is proofing bread? And how do I get it right?

By: RedmanShop | January 10, 2025

Starting your journey as a bread baker? It can be daunting — so many confusing terms! — but once you understand what everything means, the process becomes much clearer. Here, we’re diving into one of the most crucial steps to making homemade bread: proofing.

What is bread proofing?

Everyone knows that bread dough rises, right? Well, that’s basically what proofing means! It’s when bread dough is left to ferment — the yeast (commercial yeast or sourdough culture) consumes the sugars and starches in the dough and expels carbon dioxide — which causes the dough to expand as it traps the carbon dioxide within its strong and stretchy gluten network. As bread proofs, it typically doubles (or nearly doubles) in size, becoming puffy and pillowy.

Professional bakers often use terms that are different from the ones used by home bakers. In this case, there are several different terms that are used interchangeably to describe this step. Other words and terms that refer to proofing include rise and fermentation.

Which leads to the next point: Bread dough is usually left to rise two different times in the baking process, and proofing technically refers to just the second of these rises but is often used to describe both.

Why do you proof bread dough multiple times? And what is bulk fermentation?

In a standard bread recipe — take Classic Sandwich Bread for instance — the bread dough is mixed and kneaded, then left in a covered bowl to rise (usually, but not always, doubling in size). This step is often called first rise, first proof, bulk fermentation, or bulk proof. It typically takes around 1 to 2 hours, depending on the dough and the environment in which it’s left to rise.

Once the dough has undergone bulk fermentation, it is shaped. In this example, it’s shaped into a sandwich loaf and placed in a bread pan, but this also applies if you’re shaping a boule, a bâtard, or even rolls. Once shaped, the dough is left to proof a second time — this is the step that “proofing” technically refers to. Much of the air was knocked out of the dough while shaping, so this is a chance for the dough to expand again before baking. This step is sometimes called second rise or second proof.

What is the best bread proofing temperature?

One of the biggest keys to successfully proofing bread dough is temperature. Yeast thrives best in a warm environment, and the warmer the conditions, the quicker your dough will proof. “Breads do well in the low to mid-70s, between 72°F to 78°F,” says Baking Ambassador Martin Philip. “That’s just the right range to encourage yeast activity without having your dough move so fast that it overproofs or fails to develop flavor.”

Martin prefers an electric folding bread proofer, which allows him to control the temperature and environment in which his bread proofs. But you can also be intentional about where in your kitchen or home you place your bread to proof to ensure you have the best environment — and temperature — for yeast to thrive.

Where should I proof bread dough?

Ideally, you want to find the warmest spot in your house, where cozy temperatures will encourage yeast activity. Options include:

  • Near a radiator or wood stove
  • The top of your fridge
  • The inside of your (turned off) oven with the oven light on
  • Your empty dryer: Spin it for a couple of minutes to warm it up, then turn it off and pop your container of dough inside
  • On top of a heating pad (on low) or dough riser
  • In a temperature-controlled proofing box
  • In your microwave, with a cup of boiling water tucked in beside it

If you’re baking bread in the summer or your house is naturally warm, you may not need to go with any of these options — your kitchen counter may be warm enough. A digital thermometer is a helpful way to gauge the temperature of your bread throughout proofing: If it stays around 72°F, it’s fine where it is. If it drops in temperature, consider moving to a warmer spot.

How should I cover my proofing bread dough?

While many cookbooks recommend using a tea towel to cover rising dough, we don’t agree. “Draping your dough with a kitchen towel is not a sufficient cover — your dough will dry out, forming a skin,” says Martin. “Use an airtight lid, bowl cover, or plastic wrap instead.” If you’re doing a lot of bread baking, consider a lidded dough-rising bucket.

A dough-rising bucket provides an airtight cover and markings to gauge when your dough actually doubles in size.

How long does it take to proof bread?

It depends! (Not a very satisfying answer, we know.) Recipes typically include time ranges (“Let rise for 1 to 1 1/2 hours”), but these should be considered guidelines, not hard and fast rules. Instead, use visual clues to determine if your dough is well-proofed — more on that next.

How can I tell if my bread dough is done proofing?

If the dough is supposed to double in size during bulk fermentation, place it in a straight-sided container with markings on the side so you can easily and accurately tell when it has doubled in volume.

If you’re proofing shaped sandwich bread dough in a loaf pan, look for the dough to rise 1″ over the lip of the pan. (Don’t guess, use a ruler to measure!)

For freeform loaves, use the poke test to determine proofing: Lightly flour your finger and poke the dough down about 1″. If the indent stays, it’s ready to bake. If it pops back out, give it a bit more time. See more guidelines here: How do I know if my bread dough has risen enough?

And remember: As a general rule, if your dough is proofing in a cool environment, it will take longer. If it’s proofing in a warm environment, it will be quicker.

When sandwich bread dough rises 1″ over the rim of the pan, it’s time to bake!

For better bread, nail your proof

“Proofing is every bit as important as the other foundational aspects of bread making, from mixing to baking,” says Martin. “It’s key to bread’s structure, oven spring, and the beauty of the final loaf.”

While proofing may be the most passive step in bread baking — you literally sit back and wait — it’s also one of the most crucial. Being mindful of how you cover your dough, where you place it, and when you bake it will set you up for baking success and better bread.

Posted on Leave a reply

Sourdough starter troubleshooting

Sourdough starter troubleshooting

By: RedmanShop | January 10, 2025

“Did I kill my starter?” This is a surprisingly common sourdough question on our we receive. Novice and experienced bakers alike worry about the viability of their starters and call us for sourdough starter troubleshooting advice.

For many sourdough bakers, the underlying biochemistry at work in their starter remains a bit of a mystery. Thankfully, it’s quite possible to bake great sourdough bread while still being a little fuzzy when it comes to what’s actually happening in that little jar of starter.

The 6 to 10 days it takes to create a healthy and mature sourdough starter from scratch requires slightly more attention to “death threats,” because a fledgling starter hasn’t yet developed the defenses that characterize a mature starter. But once your starter is fully developed, it’s really pretty darn hard to kill.

And if you’ve purchased a sourdough starter from us, rest assured that it’s a mature specimen that will stand up well against unwanted bacteria or mold.

Things that WON’T kill your sourdough starter

METAL: Stirring your starter with a metal spoon or placing it in a metal bowl won’t kill your starter. While we don’t recommend making or keeping your starter in contact with reactive metals like copper or aluminum, stainless steel is harmless.

MILD NEGLECT: Missing a feeding or not timing the feedings exactly 12 hours apart won’t even come close to killing your starter. Please don’t ever set your alarm to get up in the middle of the night to feed your starter!

INCORRECT FEEDINGS: Feeding your starter the wrong amount of flour or water won’t kill it. While your starter may seem too dry or too wet, and may not rise the way you expect, no permanent damage has been done. You can correct its consistency by adding a little more flour or water, and then being more careful the next time you feed it.

BRIEFLY FREEZING YOUR STARTER: While there’s some dispute among sourdough enthusiasts about the benefits and/or dangers of freezing sourdough starter, a brief period in the freezer isn’t likely to kill a fully developed starter.

I recently froze a portion of my well-maintained starter a few hours after it was fed. Three days later I thawed it out at room temperature and let it continue to ferment. It was definitely sluggish at first, but after a second feeding it rose well and had a good aroma.

That being said, too much time in the freezer will definitely damage some of the wild yeast in your starter, and is also likely to kill off some of the friendly bacteria that contribute flavor. If you need to put your starter on hold for an extended time, we recommend drying your starter.

Things that WILL kill your sourdough starter

HEAT: If you allow your sourdough starter to ferment in the oven with the light on to keep it warm, and then forget it’s in there and turn on the oven, it’s unlikely your starter will make it out alive. Yeast dies at 140°F, and it’s likely that your sourdough starter will suffer at temperatures even lower than that. It’s best to maintain your starter at comfortable room temperature (around 70°F), though a little higher or lower won’t hurt anything.

SEVERE NEGLECT: If you neglect your starter long enough, it will develop mold or signs of being overtaken by bad bacteria. Mold can appear in various colors and is typically fuzzy in appearance. Bad bacteria is generally indicated by an orange or pink tinge or streak. Once your starter has lost its natural ability to ward off intruders, it’s time to start over.

How to tell if your starter has gone bad

“Hooch” is the liquid that collects on the top of your starter when it hasn’t been fed in awhile. This liquid is the alcohol given off as wild yeast ferments. The presence of hooch isn’t a sign that your starter is in danger. However, it does indicate that your starter is hungry and needs to be fed.

When your starter is neglected for an extended period, the hooch tends to turn from clear to dark-colored. We get lots of calls from sourdough bakers worried about the safety or danger of various hooch hues. Is gray bad? What about brown or black? Surprisingly, none of these colors indicate that your starter has spoiled.

See the orange streak? This starter shouldn’t be saved.

However, if you see a pink or orange tint or streak, this is a sure sign that your sourdough starter has gone bad and should be discarded. The stiff starter above was left out at room temperature for two weeks. It’s definitely time to throw it out and start over.

Sourdough starter troubleshooting: points to remember

  1. Well-maintained mature sourdough starters are extremely hardy and resistant to invaders. It’s pretty darn hard to kill them.
  2. Throw out your starter and start over if it shows visible signs of mold, or an orange or pink tint/streak.

I hope you’ll share your own sourdough starter questions and discoveries below. There’s always more to learn when it comes to sourdough!

Posted on Leave a reply

What Does Baking Soda Do

What Does Baking Soda Do

By: | January 9, 2025

Baking soda can serve many purposes. With its slightly bitter and salty taste, it works in conjunction with baking powder to act as a leavening agent in many baked goods. Due to its unique and highly alkaline composition, baking soda can also be used for cleaning, deodorizing, beauty products, insect bite relief, natural mouthwash, weed killer and much more.

We have all encountered baking soda at some point in our lives. The multipurpose and multifunctional, naturally occurring chemical seems to be everywhere. In our pantries, cleaning products, refrigerators, and, of course, recipes. Though baking soda is widely known and utilized, many are still unfamiliar with the core of what it does or to the extent; it is necessary in recipes. Commonly used as a leavening agent in baked goods, baking soda is often confused with its counterpart leavening agent, baking powder.

What’s the difference between baking soda vs baking powder? To understand how baking soda works and why it is unique, we must understand what baking soda really is.

What Is Baking Soda?

Baking soda, also known as sodium bicarbonate, is a naturally occurring crystalline chemical compound but is often found in powder form. Although baking soda is naturally occurring, it is often mined and, through a chemical process, created. Most baking sodas found commercially in the United States come from ore mined in Wyoming. The ore is heated until it turns to soda ash, and then it is combined with carbon dioxide to create the chemical baking soda. That being said, naturally occurring baking soda is also still available and is mined in the form of nahcolite. Nahcolite is the form of sodium bicarbonate that is most natural and has no chemical additives. Bob’s Red Mill is proud to sell natural baking soda that has not been chemically produced.

Baking soda is highly versatile and when used by itself or combined with additional compounds, can lend itself as a remedy for multiple different uses. Valued for its cleaning and baking properties, baking soda has been used for thousands of years. Use of baking soda dates back to Ancient Egypt when it was used as a cleaning and drying agent in the process of mummification. Baking soda became commercially available during the mid-19th century and has since become a staple in most homes, whether it’s in cleaning products, beauty products, or even in a wide range of cooking and baking recipes.

How Does Baking Soda Work?

Baking soda is most commonly used in baking as a leavening agent, hence its name. Before the commercialization of baking soda, biological leavening and fermentation processes were used but less convenient due to the extensive length of time associated with biological leavening. As most have formerly learned through science class and experimental measures, when a base meets an acidic ingredient like buttermilk, sour cream or lemon juice, a chemical reaction occurs. This concept is the same for baking soda as it pertains to baking. When baking soda is mixed with an acid and a liquid, it will create bubbles of carbon dioxide gas that give it a fluffy texture. That being said, baking soda can react without acid if it is warmed above 122°F or subject to long-term heat and humidity. If baking soda is stored within reasonable temperatures (at or below 77°F and 75% humidity), it will keep indefinitely.

Baking soda is generally used as an active ingredient in quick-bake recipes such as cookies, muffins, and pancakes. This is because of the fast-acting chemical reaction associated with baking soda and the acidic counterpart. When baking soda is combined with acid, CO2 gas bubbles are released, creating the “airy” effect in batter and dough. Furthermore, once the dough or batter starts to bake, the carbon dioxide will begin to filter through the dough and expand air that is trapped inside. The sources of acid combined with the baking soda will determine if the dough or batter can be kept in the refrigerator or needs to be baked immediately.

For example, if the sources of acid are dry, such as cream of tartar or cocoa powder, then they can keep longer once combined with baking soda. However, if the acids are wet, such as yogurt or lemon juice, then the resulting batter will need to be used promptly. Baking soda can also provide dough with increased pH levels, which creates a heightened alkalinity. Through the increase in pH, the gluten in the dough becomes weakened, which creates a tender texture for cookies and pastries versus something chewier such as bread. Quantity is an important component, considering the effect baking soda has on baking recipes.

Baking Soda for Household Use

Baking soda is a versatile product that has many household uses simply by itself or when combined with other products. Due to its coarse salt-like nature, baking soda can be used as a scrub of sorts for fruits and vegetables, grills, countertops and even teeth. Commonly added to many kinds of toothpaste, baking soda is a natural powerhouse cleaning product. Baking soda is widely used as a refrigerator deodorant of sorts because some believe it neutralizes lingering odor. Chemically, baking soda reacts in a similar fashion when it is used in baking recipes such as muffins and scones as it does with odors. This is because baking soda is basic and most odors are acidic, and this provides for a similar atmosphere for a neutralizing reaction to occur.

Baking soda and vinegar are not only baking partners in crime, but also stellar cleaning partners, due to their chemical composition. When combined in baking recipes, baking soda and vinegar (or acid) work together harmoniously to create the leavening process of batters and doughs. Similarly, when combined for cleaning purposes, baking soda and vinegar create an abrasive environment that is tough on stains, dirt, and clogged drains. As previously mentioned, when baking soda is heated above 122°F, it creates carbon dioxide. This is what makes baking soda a great fire extinguisher and why it remains one of best ways to put out a grease fire. The increase of carbon dioxide cuts off the fire’s source of oxygen, creating an environment that is not sustainable for the fire.

Baking Soda vs. Baking Powder

Similar to baking soda, baking powder is a leavening agent used in quick-bake recipes. Often confused and mistaken for one another, these two interact within recipes in different ways and are very different in composition. It is important to consider the differences between both baking soda and baking powder when exploring baking recipes. As previously mentioned, baking soda is a leavening agent that, when mixed with acid and liquid, becomes activated and produces CO2 bubbles. Similarly, baking powder is a leavening agent that produces CO2 bubbles. However, the composition is one of the major differences.

Baking powder is composed of baking soda itself, paired with another dry acid, such as cream of tartar. As a result, baking powder has the ability to be single or double acting. Single-acting baking powder performs in a similar way to baking soda that has been combined with an acid. It quickly releases CO2 and creates the leavening process that must be quickly taken advantage of. However, a double-acting baking powder can be activated twice through different means. Once the liquid is added to the baking powder, it becomes activated and produces the CO2 bubbles.

In addition to the first activation, there is a secondary activation that can take place once the solution, or batter, is exposed to heat (placed in the oven). This also creates the ability for an elongated time frame that is not present within the reaction caused with baking soda and acid. This means that because baking powder is activated by liquid and already has the dry acid component (cream of tartar), it can be preserved in the refrigerator longer. This is why items such as cookie dough can remain in the refrigerator, while cake batter must be cooked promptly.

Why Is Baking Soda Important?

Baking soda is an important and fundamental component of most baked goods and many cleaning products for several reasons. It is the driving force behind the desired consistency and taste of most of our quick-bake treats, and the powerhouse cleaning agent in many of our household products. Through the chemical reaction created by combining baking soda with liquid, acid, and heat, carbon dioxide is created. These tiny CO2 gas bubbles allow for soft and airy baked goods such as cookies, pancakes, and cakes. Baking soda also increases pH levels while reducing gluten. This creates less chewy and more tender baked goods. Though baking soda recipes call for seemingly small amounts, it makes all the difference if you don’t have it. Baking soda has become an integral part of baking recipes and household use, and without it, we may not have the ability to get our fast, fresh-baked, tender, and crunchy cookie fix!

Posted on Leave a reply

10 tips for new sourdough bakers

10 tips for new sourdough bakers

By: RedmanShop | January 6, 2025

Sourdough baking seems like it should be easy, right?

After all, people have been baking naturally fermented bread for thousands of years, and it only requires three ingredients: flour, water, and salt. Well, it’s simple, but creating a starter and baking sourdough bread’s not easy — at least not until you develop your own personal process, something that works for both you and your starter.

Everything from the flour you use to the season of the year to whether you’re urban or rural plays into your sourdough bread success — or less-than-success. Talk about variables!

If you’re a new sourdough baker, you may be struggling just trying to get your starter going. The confusion, angst, and even despair that we hear among first-time sourdough bakers out there is truly distressing.

Are you having a rough time with your starter? Let us help. Here are 10 tips directed specifically at brand-new sourdough bakers that should clear up the confusion you’re feeling around not just the starter itself, but the various tools and recipes associated with sourdough baking.

1) My starter recipe says to begin with [X] flour. Can I use a different flour instead?

Sourdough starter is a combination of water and flour which, when mixed together, grows wild yeast, produces organic acids, and attracts friendly bacteria. All flours, from whole grain rye to all-purpose white, harbor wild yeast and will cultivate bacteria. But not all flours work the same: some are better right at the beginning of your starter’s life, while others have more to contribute farther along in the process.

Maybe you have a good supply of bread flour but your starter recipe calls for all-purpose (or vice versa). Perhaps the formula lists organic rye flour or golden whole wheat, and you simply don’t have them and can’t get them. No worries; just use what you have.

If your starter calls for all-purpose flour and all you have is bread flour, increase the water a bit; if it calls for bread flour and all you have is all-purpose, decrease the water a bit. And if it calls for whole wheat or rye and you have neither? Your starter may be a bit slower coming to life without the initial “kick” of a whole grain, but eventually it’ll work just fine. (Learn more about how whole grain flours affect starter in our post: Sluggish starter? Add a little whole grain flour.)

One caveat: Bleached flour may eventually yield a decent starter, but due to its natural flora having been killed by bleaching it’ll probably take a heck of a lot longer for a starter made with bleached flour to become fully active.

2) I read that you should never use a plastic bowl or metal spoon around sourdough starter. Is that true?

No, not at all. Our Baking School keeps its starter in food-safe plastic buckets and uses metal spoons or acrylic spatulas to mix it up after feeding. We wouldn’t recommend using a bowl that’ll react with sourdough’s acidity — for instance, don’t mix or store your starter in cast iron or uncoated aluminum — but other than that, glass, plastic, stoneware, acrylic, stainless steel — take your pick, all are acceptable.

3) Do I have to feed my starter with pure spring water or bottled water?

No. While chlorine and other chemicals in your treated tap water don’t create the friendliest environment for your starter, there’s no need to make a trip to the store for bottled water.

I’ve successfully used tap water in my starter for years. If your tap water is so heavily treated you can smell the chemicals, try filling an open container and leaving it at room temperature overnight. The next day your water should be good to go.

4) My new starter was very bubbly and doubling in size within 6 to 8 hours, but now it’s seemed to go dormant. Is it dead?

It’s certainly discouraging to see a starter that’s seemed perfectly happy suddenly turn into a lifeless blob. But it’s OK. As your new starter evolves, one set of bacteria gradually gives way to another; and during that transition, when neither is dominant, your starter will take a rest. Just keep feeding it; within a few days, it should show renewed signs of life.

5) Do I really have to throw away so much starter when I’m feeding it? It seems wasteful.

If you don’t remove some of your starter before feeding it, you’ll soon have gallons of the stuff filling your fridge. So yes, you do have to remove some starter; but you don’t necessarily have to throw it away. Here are your options:

  • Give your excess starter to a friend to start his or her own starter.
  • Turn it into something yummy. Within the first 4 or 5 days of your starter’s life, it won’t taste very good and probably shouldn’t be used for baking; but after that, there are many, many delicious ways to use it. See our collection of sourdough discard recipes for inspiration.
  • Substitute it for some of the flour and water in your non-sourdough recipe. For details, see adding sourdough to a recipe.
  • You also have the option of building and maintaining a much smaller starter, one that’s fed and discarded in tablespoons rather than cups. See our recipe for a smaller sourdough starter.

6) What’s the best container for storing my starter?

Something with a lid! Seriously, you can go two ways here. If you want to feed and store your starter in the same container, you want one that’s large enough to hold triple your volume of starter. If you’ll be feeding your starter in a bowl and then transferring it to a lidded container to store, the container only needs to be a bit larger than the starter itself. It’s handy to use a clear glass or translucent plastic container if you’ll be letting your starter rise in it, so you can track its progress. (Our glass sourdough crock is a preferred option.) Stoneware, plastic, stainless steel, and enameled metal are also suitable materials.

Whatever vessel you choose, the lid should fit securely, simply to prevent potential spillage if you knock the container over. But you don’t want anything airtight: it’s not necessary and could potentially result in a messy blowout.

7) My starter develops lots of small bubbles when I feed it, but it’s not really rising very well. Is that OK?

Not if you’re going to use it to leaven bread! A fed starter should double in size within 6 to 8 hours, or it probably won’t be strong enough to raise your dough.

Sometimes starter is so thin and liquid-y that there’s not enough structure for it to expand; bubbles simply rise and escape. If your starter seems thin (easily pourable rather than gloppy), try feeding it a bit more flour until it thickens up; alternatively, you can feed it with higher-protein (higher-absorption) bread flour. This might be just what it needs to start growing up, rather than fizzling out.

8) “I think I killed my starter!”

No, you almost certainly didn’t. While sourdough starter can die under extreme circumstances (e.g., having been fed with boiling water), it’s actually really hard to kill. It may be poky and slow; it may not look like you think it should. But it’s not dead. Keep feeding it on a regular schedule and eventually, it’ll start bubbling again.

Now, sourdough starter can very rarely become “infected” with mold or an evil bacteria, in which case you won’t want to bake with it. If your starter shows evident signs of mold or if it develops a pink/orange tinge, it’s time to discard it and start again.

When it comes to how your starter smells, it’s fairly common for a fledgling starter to go through a stinky period (think teenagers’ sneakers), but an established starter should never smell awful. That being said, if you’ve neglected your starter in the refrigerator longer than usual and it smells a little off, a few days of room-temperature feedings will likely restore it to its usual pleasant aroma.

For more on how to assess your starter’s health see our post, Sourdough starter troubleshooting.

9) I’m ready to bake bread. But do I really need to buy a banneton, rice flour, and a Dutch oven?

No. These all come under the heading of nice to have, but not necessary.

A banneton (a.k.a. brotform) is simply a round or oval basket that holds dough as it rises. The risen loaf is then turned out onto a baking stone, a baking sheet, or into a Dutch oven to bake. It’s useful for doughs that are quite soft and need support, keeping them from flattening out as they expand.

You can actually fashion your own rising vessel from a bowl and smooth dish towel, for soft dough. For a stiffer dough, simply allow the loaf to rise on a piece of parchment (which makes it easy to transfer to a hot baking stone); on the baking sheet on which you’ll bake it, or even in your Dutch oven if you decide not to preheat it first.

Rice flour is used to flour your banneton; it’s “slipperier” than regular all-purpose or bread flour and offers better release of the potentially sticky dough but again, not necessary.

A Dutch oven or other closed container is a real boon if you enjoy bread with excellent loft and supremely crusty crust. The container’s lid catches steam from the baking loaf, keeping its top crust soft and allowing it to expand fully. That same steam makes the crust crackly-crisp once the loaf has finished rising and the bread starts to brown.

Yes, a Dutch oven is great to have; see the details here: Bread baking in a Dutch oven. But you can certainly bake a lovely loaf without one.

10) Can you point me to a really simple recipe to get started?

Our Rustic Sourdough Bread is perfect for beginners. Since it includes a bit of commercial yeast as well as sourdough starter, you don’t have to worry about your starter being totally up to snuff: Call it the belt and suspenders approach. While sourdough purists will argue that using commercial yeast disqualifies your bread as “true” sourdough, hey, what’s in a name? If you enjoy a light-textured, crusty loaf with lovely tang, this one’s for you.

Our Naturally Leavened Sourdough Bread includes no commercial yeast, and relies entirely on a strong starter for its rise. So if you choose this recipe make sure your fed starter is very healthy and active, doubling in size within 6 to 8 hours of feeding. If your starter is ready to go, expect to make a loaf with great crust and chew, and deep, rich sourdough flavor.

The last word on sourdough baking

The wild yeast and friendly bacteria that bring sourdough starter to life are fickle, just like all living organisms. Sometimes they’re full of energy and ready to rise and shine; other times they need coddling and cajoling. It’s up to you to figure out what your starter needs — and when — in order to keep it happy and working for you.

It sounds daunting, but don’t be discouraged. Gradually, as you learn what works in your kitchen (rather than what works for that guy on YouTube or your best friend in Seattle) you’ll relax and realize that hey, sourdough bread’s not that complicated after all. It’s flour, water, salt, and time — both the hours it takes your loaves to rise, and the days you spend learning about this ancient craft through practice, practice, and more practice.

Now, take a deep breath and relax. Your ego should never be tied to how many Instagram likes your bread photo gets, nor should you be discouraged by bread bullies on Facebook dissing that loaf you were so proud of. Always remember: there are no baking police. Plain and simple, if you’re happy with the sourdough bread you bake, it’s a success.

Posted on Leave a reply

How to Make Seitan from Scratch

How to Make Seitan from Scratch

By: RedmanShop | January 5, 2025

If you’ve spent some time in the vegetarian and vegan sections of a health food store, you’ve probably come across various plant-based meat substitutes, with tofu, tempeh and gluten-free soy protein being the most popular. Whether you’ve dared to try these alternatives or not, there’s another meat-like protein taking the spotlight—seitan. If you’re like many and are left wondering what exactly is seitan and how you make it, you’re not alone. Continue reading for a complete guide covering all there is to know about this plant-based cooking product and how you can make it from scratch.

Where Does Seitan Come From?

While seitan has recently gained popularity, it’s not a new product. Instead, it’s a vegan meat substitute that has been around for years and more recently emerged with a new name. Enjoyed in China as early as the 6th century, the seitan was initially known as “mian jin” and served for centuries.

However, in the 1960s, mian jin received a “makeover” by George Ohsawa, who founded the macrobiotic diet and introduced seitan as a new term combining the two Japanese words:

  • “sei”: made of
  • “tanpaku”: meaning protein

What Is Seitan?

What is seitan, exactly?

A popular meat substitute used primarily in vegetarian and vegan meals, seitan is often referred to by many different names, including wheat meat, gluten meat, vital wheat gluten, and gluten. It’s made by combining two ingredients—wheat gluten and water—and is a soy-free alternative to many of the meat-free products available for individuals following a plant-based diet.

But what is the difference between seitan vs tempeh? When cooked, seitan takes on a meaty texture that is both dense and chewy. Because its texture is similar to that of meat, most people prefer it to tofu or tempeh when making a genuinely meaty dish. Additionally, seitan absorbs flavor exceptionally well, making it easy to include in various cuisines ranging from sweet and savory to spicy.

Luckily, making this versatile ingredient at home is easy. Creating seitan requires you to knead vital wheat gluten and water until it forms into a firm ball or loaf. Wheat flour or additional ingredients can be added to improve the texture; however, they’re not always needed.

After the dough has been formed into a ball, it is rinsed and boiled to wash away the starches. Seitan can be used to create everything from vegan chicken strips to plant-based taco meat and is a favorite amongst vegetarians and meat-eaters alike.

Can Everyone Enjoy Seitan?

Ideal for those following a plant-based diet and people who have a soy allergy, seitan is entirely soy free and high in protein, making it an excellent choice. That being said, while seitan is a delicious meat alternative, it’s not for everyone. If you’re gluten intolerant or have celiac disease, seitan is unfortunately not the meat substitute for you.

Made entirely of wheat gluten, seitan is not a gluten-free food and shouldn’t be treated as such. Additionally, while seitan contains high amounts of protein, it is not a complete protein source. Because of this, it must be combined with other sources of protein when you eat it. Ingredients like chickpea flour, soy flour, and soy sauce can be added to your seitan dough to complete the string of essential amino acids.

Seitan Ingredients

While seitan can be made in several different ways, here’s an overview of how to make seitan and the ingredients commonly used in this dish.

Vital Wheat Gluten

Vital wheat gluten, also known as gluten, is a protein naturally found in wheat. Commonly used in bread baking, when a small amount is added, it improves the texture and elasticity of the dough. Additionally, it’s the main ingredient used to make seitan and helps create a chewy, meaty texture.

Nutritional Yeast

Nutritional yeast is a top-rated vegetarian dietary supplement. Known for its pleasantly cheesy flavor, it’s loaded with good-for-you nutrients like vitamin B-12 and protein. Mix it into your favorite sauces, or add it to plant-based alternatives to recreate traditional flavors.

Spices and Flavorings

Seitan soaks up whatever is around it as dehydrated food, making it an easy ingredient to flavor. To make a delicious lunch or dinner seitan recipe that tastes similar to meat, we recommend using herbs and spices like garlic, onion, fennel, turmeric, soy sauce, molasses, tahini, and olive oil.

Broth or Liquid

Seitan is a dehydrated food, which means that it needs to be rehydrated before enjoying it. While seitan can be rehydrated using water, the result will often be a bit bland, especially if other flavorings are not added to the recipe. To rehydrate your seitan and flavor it simultaneously, choose a pre-flavored liquid like soup or vegetable broth.

How to Make Homemade Seitan from Scratch

Making basic seitan in the comfort of your kitchen is easy. Keep scrolling for a step-by-step guide to make seitan from scratch.

What you’ll need:

  • Medium bowl (2)
  • Whisk
  • Basic seitan ingredients
  • 18-inch-long sheet of aluminum foil
  • Measuring cup
  • Medium pot and lid
  • Steamer basket

Ingredients

  • 1 ¾ cups  Wheat Gluten
  • ⅓ cup Nutritional Yeast
  • 2 tsp Garlic Granules or Garlic Powder
  • 1 tsp Onion Powder
  • 2 tsp Crushed Fennel
  • ½ tsp Turmeric
  • 3 Tbsp Soy Sauce
  • 1 tsp Molasses
  • 1 tsp Tahini
  • 1 ½ Tbsp Oil
  • 1 ½ cups Mushroom or Vegetable Broth

Step 1:

Start with wheat gluten. In a medium bowl, combine the wheat gluten, nutritional yeast, and dry spices—whisk them together. Combine the remaining ingredients in a separate bowl and stir until they’re smooth.

Step 2:

Form a well in the dry ingredients and pour the wet mixture in slowly. Use a fork to bring the dough together until you notice that it’s lumpy and springy.

Step 3:

Pour the mixed dough onto a sheet of aluminum foil (or parchment paper) and wrap it, forming it into a log-like shape.

Step 4:

Bring 4-6 cups of water to a rolling boil in a medium pot and place a steamer basket inside. Next, add the seitan that’s been wrapped in foil and cover the pot with a lid allowing 80 minutes of cook time without removing the lid.

Step 5:

Once the seitan is done steaming, allow it to cool for 30 minutes before cutting it into slices or chunks. Enjoy your cooked seitan as is, sear it on the stovetop, or combine it with another recipe to create a truly satisfying meal.

Ways to Cook Seitan

Now that you know how to make homemade seitan, it’s time to decide how you’d like to cook it. Seitan can be baked, steamed, or boiled, which will all result in different textures. Whether you are looking to make vegan seitan patties, a steak, sausage, or a stir fry, there are many dishes you can make once you’ve created the seitan dough. Before determining how you’d like to cook this vegan meat substitute, we recommend finding a recipe to add it to first. Knowing what you’ll be combining the seitan with will help you decide what method to use.

Simmering Seitan

To simmer seitan, you’ll want to begin with a pot and a large portion of it. Instead of cooking your seitan in boiling water, ensure that you have simmering broth (vegetable broth or vegan chicken broth) or water and cook it until it’s fully done. Though proper simmering can be achieved with water alone, for a boost of flavor and nutrients, season the seitan with vegetable stock, soy sauce, miso paste, nutritional yeast, and other spices.

Because the seitan will be set directly into the liquid, it will soak up its flavors and develop a soft and spongy texture. Though delicious, this smooth texture won’t hold up well in firm dishes and is best when added to soups, pasta, and stews.

Steaming Seitan

To get properly steamed seitan, you will need a steamer or a steaming basket that can be easily set up in a pot. Making steamed seitan is easy, first, bring the water in the pot to a simmer and then add the seitan to the steaming basket.

This process will allow the seitan to develop a pleasant texture that is neither too soft nor too firm. Instead of creating a crust, the outer layers of the seitan will remain smooth, ideal for combining with other steamed foods like vegetables.

Baking Seitan

If you want to create a portion of seitan with a firmer consistency, we recommend baking it in the oven. Because the baking process will slightly dehydrate the seitan, it will create a firm texture and crusting outside. To bake it to perfection, simply place the seitan on a lightly greased baking sheet and bake at 180°C – 200°C/360°F – 390°F. Be sure to marinate the seitan beforehand to add flavor and prevent it from drying out.

Making seitan is an excellent way to ensure that you know what’s in your food. While cooking it for the first time might seem a bit intimidating, it’s actually quite simple. Follow the step-by-step guide above to ensure that your cooked seitan turns out perfectly. If you’re a pro at making seitan and are having trouble figuring out what meals to make with it, check out these five quick and easy seitan dinner recipes. From everyone at Bob’s Red Mill, have a filling and flavorful day!

Posted on Leave a reply

Bleached vs. unbleached flour: What’s the difference?

Bleached vs. unbleached flour: What’s the difference?

By: RedmanShop | January 4, 2025

White flour is white flour — but not all white flour is created equal. Differences in milling, as well as how the flour is treated after it’s milled, can have big impacts on flour. And one of the primary ways flour is treated is through bleaching. Refined wheat flours (i.e., not whole wheat), such as all-purpose flour, cake flour, and self-rising flour, are either bleached or unbleached during production. But what exactly does that mean? In brief: Unbleached flour is naturally aged after milling, during which time it slowly oxidizes and whitens. Bleached flour, on the other hand, uses chemical treatments to manually speed up this process. Both can be used interchangeably in baking; so why should you choose one over the other? Let’s break it down a little more.

Understanding the difference between bleached and unbleached flour

During the 1940s (the heyday of Wonder Bread, the first sliced bread on the market), white flour became a popular fixture in commercial bread. And while Wonder Bread is no longer the only, nor the most popular, bread on the market, contemporary millers are still primarily in the business of making white flour. The first step in accomplishing this is to separate the bran and germ of the wheat berry through the milling process itself. That’s what distinguishes whole wheat flour, which is made from the entire wheat kernel, from white flour, which is only the milled endosperm.

The next step in this process is to “whiten” the remaining flour. Given time and exposure to air, flour will slowly oxidize and whiten on its own. This rest period, around two weeks in the summer and up to a month in the winter, also changes flour’s chemistry so that it will create a dough that is more elastic. This is unbleached flour, and it’s how King Arthur Baking Company makes all of our refined flours. But rather than using time as an agent, as we do, many millers use chemicals to whiten flour almost instantly. As the flour comes off the line at the mill, bleaching and oxidizing chemicals are added in order to quicken or entirely replace the aging process. This is how bleached flour is made.

Wait, what exactly does “bleached” mean?

The chemicals used to whiten and/or oxidize flour include chlorine dioxide, benzoyl peroxide, and chlorine gas, all of which are currently permissible additives (though King Arthur Baking Company flours do not contain any of them). Benzoyl peroxide leaves behind some benzoic acid; some people with an acute sense of taste recognize benzoyl peroxide in baked goods because it has a bitter aftertaste, but its addition does not appreciably change its baking qualities. Chlorine gas reacts with the flour to change its absorbency, flavor, pH, and, in the case of some cake flours, its performance. In baked goods where other ingredients do not mask it, it imparts a detectable flavor to people with sensitive palates.

The most controversial additive used today is potassium bromate, which is still in use both as an oxidizer and an “improver,” strengthening dough and allowing for greater oven spring and higher rising in the oven. It has come under scrutiny, however, as tests with it have indicated that it is carcinogenic in animals and probably in humans. Since 1991, flour sold in California containing potassium bromate has had to carry a warning label, and it was recently banned in the state as well. It is also banned in Canada, Europe, and Japan, and will likely someday be banned in other parts of the United States. (This is why King Arthur bags proclaim that our flour is “Never Bromated.”)

Choosing the right flour

Ultimately, the flour you choose to bake with is entirely up to you. Bleached and unbleached flours can both be used interchangeably in any recipe without a major discernable difference. But understanding what sets them apart can help you make your decision.

Posted on Leave a reply

Protein Percentage in Flour

Protein Percentage in Flour

By: RedmanShop | January 4, 2025

Have you ever wondered about the difference between all-purpose flour and bread flour? Or maybe you’ve noticed the big number on the front of King Arthur flour bags (11.7%, in the case of all-purpose flour) and been curious about what, exactly, it refers to. The answer to both questions is the same: protein percentage, one of the most important variables in flour. But what exactly does that mean, and why does it matter?

Please note: The protein percentages listed for certain types of flour in this post are what we here at King Arthur guarantee. Other brands often have a more variable protein percentage, so results may differ.

What is the protein in flour?

When we’re talking about protein in flour, we’re talking about two very specific types of protein found in wheat: glutenin and gliadin. Crucially, these two proteins are the building blocks of gluten. When water (or a liquid including water, like milk) is added to these two proteins, they link together, forming gluten. Gliadin gives the dough extensibility (which means the dough can be stretched), while glutenin contributes elasticity (so it can snap back like a rubber band). Ultimately, if the proteins in flour form gluten, then the more protein in the flour — i.e., the higher its protein content — the more gluten-forming potential that flour has. Another way to think about it: the higher the protein content, the “stronger” the flour.

Why protein percentage — and gluten-forming potential — matters

Let’s cover a brief summary of gluten’s role in baking. When liquid is added to glutenin and gliadin, they start forming bonds that link together, developing strands of gluten.

As you mix and knead batters and doughs, you encourage the gluten to develop further. That’s because this movement and agitation encourages the gluten strands to link up and form a network, making them even stronger.

This glutinous web is capable of trapping gas bubbles; the stronger it is, the more gas it can hold, leading to more air in a baked good and thus a higher rise. At the same time, those interconnected strands become longer and stronger the more the gluten develops, which leads to more chewiness and toughness in the final product.

This can be good: You want a strong gluten network in bread dough to capture the gases produced during fermentation. It can also be bad: You don’t want a chewy, stretchy gluten network when making a soft, tender cake. That’s why the amount of gluten-forming potential in your flour, and thus its protein percentage, matters.

Choose the right flour — and the right protein content — for your baking

Let’s review three primary types of flour and how their protein content corresponds to their intended use for baking.

Cake flour: With a protein percentage of 10%, this is considered a low-protein flour. It has less gluten-forming potential; when you mix batter made with cake flour rather than all-purpose, less protein is present, and as a result, the batter will likely develop less gluten, resulting in more tender baked goods.

Bread flour: With a protein percentage of 12.7%, this is considered a high-protein flour. It has more gluten-forming potential; when you mix dough made with bread flour rather than all-purpose, more protein is present, and as a result, the dough will likely develop more gluten.

All-purpose flour: With a protein percentage of 11.7%, this flour sits comfortably in the middle — enough protein to develop gluten in bread dough, but not so much that it can’t also be used to make tender cakes, scones, biscuits, and more.

There are plenty of other flours, all with different protein percentages suited to specific types of baking. There’s high-gluten flour, for instance, with a whopping 14.2% protein content that makes it well suited to artisan breads or bagels; on the opposite end of the spectrum, pastry flour has only 8% protein content, so it’s great for bakes like biscuits, scones, and pie crusts.

And finally, a note on whole wheat flours. The total protein content of whole wheat flour is 13.2%, so you might think that, because of its high protein percentage, it would automatically be great for making bread. And it is, but with some caveats.

Because whole wheat flour contains all parts of the wheat berry, including the bran and the germ, the gluten structure is affected. That’s because bran has sharp edges when ground, which cut some of the gluten strands and interferes with their structure. So bread recipes (and other baked goods) with whole wheat flour typically call for specific steps to get around this: They’ll include a long rest time to allow the wheat bran to soften, or call for a second type of flour to get the flavor and nutrition of whole wheat flour but the gluten benefits of another flour.

Why it matters which brand of flour you buy

Unfortunately, some flour brands allow wide fluctuations in their protein content, so every time you use a new bag of flour, you’ll get slightly different results. Baking with flour that has a uniform protein content will give you the best, most consistent results at home, so there’s no wasted time or ingredients — just lots of delicious baked goods.

Posted on Leave a reply

What Is a Dutch Oven Used For?

What Is a Dutch Oven Used For?

By: RedmanShop | January 4, 2025

From homemade breads to braised meat, the Dutch oven is a piece of cookware that finds itself on the wishlists of home chefs everywhere. It’s typically made from seasoned or enameled cast iron or ceramic and is able to withstand high heat. A versatile kitchen essential, the Dutch oven comes ready to handle most cooking tasks, keeps your food warm and waiting for extended periods of time, and tends to produce richly flavored end results that dinner guests swoon over. If you are a home chef that wants to take their cooking skills to the next level, then a classic enameled Dutch oven just might be a worthy investment.

This article is going to answer the questions “What is a dutch oven and what is it used for?” Keep reading to learn about the many benefits and uses of this cast iron cookware.

Bread

One of the easiest (and more surprising) ways to use a Dutch oven is actually for breaking bread. About a decade ago, professional baker Jim Lahey found that perfectly golden bread could be made without the need for kneading, instead shaping it in his Dutch oven. Since then, bread enthusiasts everywhere have purchased the classic Dutch oven with only one desire: to bake incredible loaves of homemade bread with little effort right in the comfort of their own kitchens. If you’re looking to try it out yourself, here’s the recipe for No-Knead Artisan Bread that can be found on our bags of Artisan Bread Flour.

Casseroles and Lasagnas

Devout followers of the Dutch oven swear by its incredible ability to make one-pot casseroles and lasagnas. Spread a layer of sauce, a layer of pasta or tortillas, a layer of cheese, then bake it all in the Dutch oven until it’s cooked through and ready to be devoured. For a simple and taste-filled weeknight meal, try assembling this hot and bubbly Easy Enchilada Casserole in your Dutch oven.

Skillet Cookies

If you’ve ever sat around a restaurant table with friends going bite for bite into an ice cream-topped skillet cookie, you’ve more than likely dreamt of making your own at home. With a Dutch oven, the good news is you can! Simply add your homemade cookie dough in an even layer to your Dutch oven and bake until golden. As an after-dinner sweet treat, experiment with a mix of chocolate and marshmallow with this recipe for A Chocolate Marshmallow Skillet Cookie.

Chicken Stock

Dutch ovens are notorious for roasting chickens, so when it comes to homemade chicken stock, they’re your easiest bet. Once you’re done roasting the chicken, save the juices and use them as a base for your homemade chicken stock. It saves you the extra time spent cleaning and also makes for a rich and wonderful homemade stock that you can cook right on the stovetop. With your chicken stock prepared, try this recipe for Lemony Chicken Barley Soup, a hearty dish made with pearl barley and lemon.

Frying

Frying can often prove to be messy and full of oil splatters, but it’s a method of cooking that can come in handy for everything from homemade donuts to latkes. Because the sides of the Dutch oven are tall and the fact that it can handle extremely high heat, this makes it a perfect candidate for all your once-in-a-while frying needs. If you’re looking to fry something unique and tasty in your own Dutch oven, give this Gluten Free Fried Chicken recipe a try, it’s made with almond milk, apple cider vinegar, and Bob’s Red Mill Gluten Free 1-to-1 Baking Flour.

Braised Meats

We promise you’ll love this easy fall dinner recipe. The technique of braising meats is surprisingly simple (especially when considering the end result it yields). After seasoning and searing your meat in the Dutch oven, take it out and add a simple mixture of onions, celery, and carrots. Next, deglaze the pot, return the meat, let your liquid simmer, then move it all into the oven at 325°F. In this process, the magical workings of the Dutch oven are truly given their time to shine. Pair the richness of a braised meat dish with something like this Market Greens with Millet salad, and you’re all set for dinner.

Roasting

Okay, here comes one of the primary reasons why household cooks everywhere opt for purchasing a Dutch oven: its incredible roasting capabilities. In a large Dutch oven, you can actually prep an entire chicken with a simple mixture (like lemon, garlic, onion, butter, salt, pepper and fresh herbs) then slide it into the oven and let it do its thing. In approximately an hour and a half, you’ll have a crispy, juicy, beautiful chicken that’s bursting with flavor. After your chicken is finished, pair it with any one of these 6 Stunning Grain Bowls for a delicious and nutritious meal.

Poaching Chicken

If you’re looking for a moisture-filled and tender chicken, you may lean towards the idea of poaching to prevent dryness. Because the Dutch oven is deep and also good at retaining heat, it can hold your chicken and your water while still allowing room for it to simmer to perfection. Poached chicken works well for shredding and including in recipes like this Chicken Taco Casserole (which you can conveniently make in your Dutch oven).

Soups, Stews, and Chilis

When it comes to soups, stews, and chilis, there’s nothing quite like the intensity of the layered flavors that a cast iron Dutch oven brings forth. You’re able to start with ingredients like veggies, add your meats, beans, or whatever you’d like, then top it all with cheese or additional fresh herbs. Whether you’re going for a beef stew or a hearty vegan chili, you’ll be able to cook a variety of different recipes with this piece of cast iron cookware. Bob’s Red Mill Vegi Soup Mix is made from a hearty combination of yellow and green split peas, barley, lentils, and pasta, and makes for a great base for soups, stews, and chilis that can be cooked right on the stove.

Risotto

Risotto is famous for requiring an immense amount of constant stirring when it’s done the traditional way on the stovetop. Enter the Dutch oven and your weeknight dinner just became a whole lot easier! Bake your rice and chicken stock in the oven, covered, until the liquid has been absorbed. When you pull it out, give it a hearty stir, and you’ll be left with creamy and wonderful risotto (made with a lot less effort). Experiment with the selection of  unprocessed rice for an appealing risotto texture, or try this recipe for Vegan Quinoa Mushroom Risotto.

Applesauce

With the slow cooking style of the Dutch oven and its ability to be popped straight into the oven, it’s the perfect vessel for creating sweet and beautiful baked applesauce. Simply peel, quarter and core your apples, toss them in with some brown sugar, butter, cinnamon and lemon juice, and bake until the apples are soft. Serve warm (perhaps over a bowl of ice cream sprinkled with some Rolled Oats).

Pasta

Many of us are used to boiling a big pot of water when we’re creating a pasta dinner. However, when the Dutch oven enters the kitchen scene, pasta can become way more fun and full of flavor. If you use a combination of liquids (broth or wine) that double as sauce ingredients while also cooking your pasta through, you can save water, time, eliminate dishes, and also end up with a flavor-filled result. For a fresh and tender homemade pasta, give Pasta Recipe a try, made with olive oil, eggs, semolina pasta flour, and water.

Other Creative Uses

Although the Dutch oven is clearly an ideal choice for a variety of yummy, easy recipes, it has a couple other creative uses, too. It can be used as a way to keep food cold. Just fill it with ice water, let it sit, pour it out, dry it, then add your food to keep it chill and fresh. In addition, the enameled lid of a cast iron Dutch oven can be turned upside down, covered with foil, set upright in its knob, and used to hold food that needs to be browned. And finally, for the campers out there, the Dutch oven (depending on the brand) is known as a trusty companion to meals done over the campfire.

Types of Dutch Ovens

Lodge: The Lodge Dutch oven is porcelain-enameled, oven-safe up to 500°F, and can be used on any cooktop, aside from over the campfire. They do, however, make a cast iron deep camp Dutch oven perfect for outdoor adventures.

Le Creuset: A pricier Dutch oven than some of the others, you can cook anything in this enamel-coated beauty. You can find a Le Creuset Dutch oven in a variety of sizes to suit your needs.

Tramontina: With an enamel coating and an ability to withstand oven temps up to 450°F, this is a great choice for large families or those who love hosting gatherings.

Anolon: The Anolon has a matte black enamel interior, large size handles that make it easy to hold, and is oven safe up to 500°F.

Staub: Known for its ability to brown evenly, the Staub Dutch oven lid can withstand 500°F, and the pot can deal with 900°F!

Whether you’re using your cast iron Dutch ovens for a dessert dish of skillet cookies, a big batch of applesauce, or to roast a whole roasted chicken, the possibilities for this versatile kitchen essential are endless.

Happy cooking!

Posted on Leave a reply

What Is Tapioca Flour & Where Does It Come From?

What Is Tapioca Flour & Where Does It Come From?

By: RedmanShop | January 4, 2025

Even if you’re not an avid baker, you’ve probably heard about tapioca flour once or twice. Often considered a baker’s secret ingredient, tapioca flour is just the thing you need to take your favorite recipe to the next level. If you’ve ever made a stew that was too watery or a pizza crust that didn’t quite have the chewy-on-the-inside, crispy-on-the-outside crust that you were hoping for, then you’ve had reason to use tapioca flour.

Though incorporating starches into your baking routine might be a new concept to you, it’s been around for years. Starches are an excellent way to amp up the texture of any recipe. Whether you’d like to thicken up your favorite pie pudding or create the ooey-gooey gluten free cookies that you have saved on your Pinterest board, tapioca flour is your new best friend.

At RedMan, we know just how useful starches can be. To help you get started, we created this all-in-one guide to tapioca flour. Use it to learn more about this helpful starch and determine which of your favorite recipes would benefit from it. Let’s get started!

Tapioca Powder

Tapioca is a starch that derives from the cassava root. This starch is extracted through a process of washing and pulping. Once enough wet pulp has been gathered, it is then squeezed to extract the starchy liquid. This cassava starch is a dietary staple in various countries in Africa, Asia and South America.

Tapioca starch is an essential ingredient in gluten free baking and a favorite amongst those following a paleo diet. Naturally gluten free, tapioca flour can serve as a wheat substitute in a variety of gluten free recipes.

Because this cassava starch is both odorless and tasteless, it makes it easy to add to any recipe (savory or sweet) without changing the flavor of the recipe itself. When added to baked goods, tapioca starch helps the ingredients properly bind together.

A function that gluten is often used for. Tapioca starch’s binding abilities help bakers achieve baked goods that are fluffy, light and spongy in texture. Like many other starches, tapioca flour can also be used as a thickening agent in soups, stews and puddings.

How to Cook with Tapioca Flour

Have some tapioca flour in your cupboard that you’re not sure how to use? We’ve got you covered. Like other starches, tapioca flour works as a great thickening agent when added to liquid-based foods. However, there are a few differences between tapioca flour and other starches. One of the most notable differences is that tapioca flour retains its texture even after it’s been frozen. This means that when using tapioca starch, you no longer have to worry about freezing the leftover soup you’ve made. Simply place it in the freezer, let it thaw once you’re ready to eat, and enjoy! It will still have the same thick and creamy texture that it had before.

If you already use starches in your baked goods and want to change things up, then try using small tapioca pearls to make this Easy Tapioca Pudding. Simple to make, this creamy dessert is the perfect comfort food!

Where to Purchase Tapioca Flour

Now that you know a little more about tapioca flour, it’s time to start using it in your recipes. Our Bob’s Red Mill Tapioca Flour is one of our most versatile gluten free flours. Certified gluten free, paleo, kosher, vegan and non-GMO, this flour comes straight from the cassava plant itself. No extra processing or ingredients necessary! Use it as a thickening agent or to make delicious desserts like bubble tea.

Tapioca Flour Uses

Now that you know what tapioca flour is, it’s time to start using it! When baking or cooking with tapioca flour, we recommend using it alongside other gluten free flours such as almond flour. This will help ensure that your recipe achieves the desired consistency. It’s also important to note how much liquid is in the recipe.

When combined with liquid, tapioca flour will turn into a paste-like substance that can then be stirred into the rest of the recipe. Tapioca flour’s water-absorbing capabilities make it perfect when adding moisture to baked recipes or used to thicken sauces. Because it is tasteless and odorless, it can be added to a recipe without changing the flavor.

Use It as a Thickening Agent

Want to thicken your favorite soup recipe without using traditional flour? Use tapioca flour! Despite its name, tapioca flour is a starch that makes a great gluten free thickener. Instead of using wheat flour to thicken a soup or dressing, you can use tapioca flour to achieve the same effect. Commonly substituted at a 1:1 1/2 ratio, we recommend first creating a slurry of tapioca flour and then adding it to your recipe. Doing so will ensure that the tapioca flour is evenly distributed and help prevent clumping.

Another thing we love about tapioca flour is the ability to enhance the appearance of a dish. When combined with liquid, tapioca flour will give a meal a glossy finish, unlike cornstarch, which is known for producing more of a matte finish. While a glossy finish works well with pies and salad dressings, it might not be the perfect match for a gravy dish. Knowing how and when to use tapioca flour is key to perfecting your favorite recipe.

Use It to Add Structure to Baked Goods

Tapioca flour is excellent for baking! Especially when it comes to gluten free goods. Adding just the right amount of tapioca flour to your baked treats will create a light, airy, crispy and chewy texture. Perfect for adding to bread, cookies, brownies and pie crusts, tapioca flour is a great way to ensure that your ingredients bind together without using gluten! When measuring out tapioca flour, it’s crucial to get it just right. While adding the right amount will help you achieve the perfect texture, adding too much could turn your treats into a gummy mess.

Use it to Make Bubble Tea

Lastly, step out of your kitchen comfort zone and use tapioca flour to make bubble tea! To make a perfect tapioca pearl dough or boba pearl, simply add hot water and food coloring to tapioca flour. Then follow along with your favorite bubble tea recipe to create the perfect boba pearl. A fun and unique treat, be sure to buy extra-wide straws to drink your milk tea with tapioca balls. It’s half the fun!

The Difference Between Tapioca Flour and Cassava Flour

You may be wondering what the difference between tapioca flour and cassava flour is, especially since they both come from the same plant. While the terms tapioca flour and cassava flour may sometimes be used interchangeably, these two flours are incredibly different. As we discussed earlier, tapioca flour is made by extracting the starch from the cassava root through a method of washing and pulping.

Cassava flour, on the other hand, uses a significantly different method. When making cassava flour, the whole root of the cassava plant is used. To make this flour, the root is peeled, dried, and ground. Because the entire root is used, cassava has much more dietary fiber than tapioca flour, which creates a different result when adding to recipes.

Ready to start adding tapioca flour to your recipes? Try it out in the Gluten Free Chicken Pot Pie. The perfect comfort food to any season, adding tapioca flour to your pie, has several benefits. Adding this flour to the pie filling will help thicken it to the desired consistency. Whereas mixing tapioca flour into the gluten free crust will work to unite the ingredients together and create a light, airy and flaky treat. This creamy dinner can be made the night beforehand, or cooked and enjoyed the same day. Make it as one big pie to slice out, or turn it into six individual pies for the entire family to enjoy!

Now that we’ve answered the question “What is tapioca flour,” we hope that you have a better understanding of this incredible starch! From gluten free recipes to boba tea, we’re confident that this guide will inspire you to create something great with tapioca flour. Because each dish is different, it’s important to remember that tapioca flour won’t work in every recipe. Follow these guidelines and get to know this excellent ingredient and some of the tapioca flour substitutes. We know you’ll come up with something delicious! From everyone at Bob’s Red Mill, Happy Baking!

Subscribe to our Newsletter Now

Get the latest recipes, products and classes available on RedManShop.